Purple Haze Carrots
70 days. This 2006 AAS winner is the first Imperator-shaped purple carrot. Sure to be the talk of the table, Purple Haze has a sweet flavor with a tender yet snappy crunch. The 10-12 inch purple-skinned roots have vivid orange centers, which make quite an eye sensation when sliced on a relish tray. Purple color will fade when cooked. HV
Daucus carota var. sativus: Most gardeners grow carrots for munching, salads, or juicing. The first concern is flavor. Each year we grow dozens of carrot varieties searching for improvements to current offerings, plus we strive to fill slots where traditionally there have been lapses in carrot maturity. We believe our offerings of top quality carrots are second to none.
CULTURE: The key to good carrot production is soil preparation. When the soil is somewhat dry, spade or till it to a fine texture 6-10 inches deep. Avoid the temptation to work the soil when it's too wet. Cloddy ground will not make smooth straight roots. Work in lots of composted organic matter, as this will help your soil maintain a very loose condition for uniform root development. Avoid fresh manure or excess nitrogen fertilizer. They can cause forks, splits, and rough hairy roots. Optimum pH range for carrots is 5.5-7.0.
Direct sow April 1st to July 15th. Consider making your last sowing a winter keeper variety. Sow the seeds thinly, about 4 seeds per inch and about 1/4-1/2 inch deep, with 12-16 inches between the rows. Cover the seed with vermiculite or sifted compost. This prevents crusting and helps retain moisture. Mix 1/4 teaspoon of seed in a gallon of sand or vermiculite to uniformly sow 30-50 row feet. Maintain an even soil moisture level at all times. Expect the seed to emerge in 6-21 days at an optimum soil temperature of 60-70°F. Thin carefully to about 1-3 inches apart to get the most uniformly sized roots. When the plants have 7-10 leaves, hill 1-2 inches of soil around the crowns to prevent green shoulders.
INSECTS: Carrot fly maggots can be controlled by covering the rows with insect barrier fabric at planting or by growing a resistant variety like Flyaway.
DISEASE: Carrots are subject to various blights; practicing a 3-year crop rotation and proper sanitation can prevent most problems.
HARVEST: Carrots are best harvested any time their orange color is bright. This is when their flavor and texture are optimum. Irrigate well prior to harvest to ensure the roots have absorbed their maximum capacity of water. Store at 34°F and 95% relative humidity.
SEED SPECS: Minimum germination standard: 75%. Days to maturity calculated from date of direct seeding. Usual seed life: 3 years. Approximately 650-750 seeds per gram; 28 grams per ounce.
----------
PURCHASED: 1g from Territorial Seeds Feb '09. $3.25
STARTED SEED: Direct sowed into the garden on 3/30/09. Covered with boards (as per Granny's method - I'm not gonna argue with 50 years of gardening experience!)
HARDENED OFF:
TRANSPLANTED IN GARDEN:
DISEASE ISSUES:
INSECT ISSUES:
HARVEST YEILD & DURATION:
Tuesday, March 31, 2009
Sugarsnax 54 Carrots
Sugarsnax 54 Carrots
68 days. Super tasty and nutritious, Sugarsnax 54 is sweet and tender for superior eating quality. Rich, dark orange color reveals the extra high beta-carotene content. Slender roots grow 9 inches long with strong tops. Shows resistance to alternaria, cercospora and pythium. HV.
Daucus carota var. sativus: Most gardeners grow carrots for munching, salads, or juicing. The first concern is flavor. Each year we grow dozens of carrot varieties searching for improvements to current offerings, plus we strive to fill slots where traditionally there have been lapses in carrot maturity. We believe our offerings of top quality carrots are second to none.
CULTURE: The key to good carrot production is soil preparation. When the soil is somewhat dry, spade or till it to a fine texture 6-10 inches deep. Avoid the temptation to work the soil when it's too wet. Cloddy ground will not make smooth straight roots. Work in lots of composted organic matter, as this will help your soil maintain a very loose condition for uniform root development. Avoid fresh manure or excess nitrogen fertilizer. They can cause forks, splits, and rough hairy roots. Optimum pH range for carrots is 5.5-7.0.
Direct sow April 1st to July 15th. Consider making your last sowing a winter keeper variety. Sow the seeds thinly, about 4 seeds per inch and about 1/4-1/2 inch deep, with 12-16 inches between the rows. Cover the seed with vermiculite or sifted compost. This prevents crusting and helps retain moisture. Mix 1/4 teaspoon of seed in a gallon of sand or vermiculite to uniformly sow 30-50 row feet. Maintain an even soil moisture level at all times. Expect the seed to emerge in 6-21 days at an optimum soil temperature of 60-70°F. Thin carefully to about 1-3 inches apart to get the most uniformly sized roots. When the plants have 7-10 leaves, hill 1-2 inches of soil around the crowns to prevent green shoulders.
INSECTS: Carrot fly maggots can be controlled by covering the rows with insect barrier fabric at planting or by growing a resistant variety like Flyaway.
DISEASE: Carrots are subject to various blights; practicing a 3-year crop rotation and proper sanitation can prevent most problems.
HARVEST: Carrots are best harvested any time their orange color is bright. This is when their flavor and texture are optimum. Irrigate well prior to harvest to ensure the roots have absorbed their maximum capacity of water. Store at 34°F and 95% relative humidity.
SEED SPECS: Minimum germination standard: 75%. Days to maturity calculated from date of direct seeding. Usual seed life: 3 years. Approximately 650-750 seeds per gram; 28 grams per ounce.
----------
PURCHASED: 1g from Territorial Seeds Feb '09. $2.85
STARTED SEED: Direct sowed into the garden on 3/30/09. Covered with boards (as per Granny's method - I'm not gonna argue with 50 years of gardening experience!)
HARDENED OFF:
TRANSPLANTED IN GARDEN:
DISEASE ISSUES:
INSECT ISSUES:
HARVEST YEILD & DURATION:
OTHER NOTES:
Phenology
Phenology
1 : a branch of science dealing with the relations between climate and periodic biological phenomena (as bird migration or plant flowering)
2 : periodic biological phenomena that are correlated with climatic conditions
Here's some of the phenology advice I've come across in regards to gardening:
When red winged blackbird females return it is time to plant peas.
When the chickadees build their nests, plant peas and spinach.
When dandelions are blooming plant potatoes, beets, lettuce, spinach and carrots.
When the iris bloom, plant the peppers and eggplants outside.
When lilac is in first leaf, plant beets, lettuce, and spinach.
When lilac blooms, plant beans, cukes and squash.
Plant corn when oak leaves are the size of squirrels ears.
Plant your corn when apple blossoms start to fall.
Plant soybeans when oak leaves are the size of mouse ears.
Sunday, March 29, 2009
All the little changes we make as we go along
Saturdays have become my chance to putter around in the garden without having to monitor our toddler. It's nice to have a few minutes of peace and quiet. Yesterday however the heavens decided to open wide and we were blessed with quite bit of rain (about 1/2" over the course of a few hours) which is nice for the plants but not so good for staying dry. However DH was a dear and decided to give me the afternoon "off" anyway, even if I couldn't putter in the garden.
So of course I kept to the "theme" and ran off to Garden Fever (the local nursery) as soon as I'd finished paying the bills. I was tempted by so many things! (Another rain barrel, a beautiful dark magenta blossomed magnolia tree, lots of ceramic pots, fun tin flowers, new very hip rain boots, summer blooming bulbs, a bird bath and a beautiful fountain.) Yet! I refrained.
I went initially to get some Sulphur (organic fungicide) for the purple blotch that's attacking the garlic. For once the nursery was actually cheaper then what I was looking at on-line. Score! I also recently read that you should not plant marigolds next to beans - which I was completely planning on doing. Uh Oh! So I followed up on what does do well and apparently beans benefit from summer savory which improve their taste. I thought I'd pick up a packet of seeds but they didn't have any. It's not a very popular herb. I'll have to find some recipes I can make with it. Anyway they were placing another seed order tomorrow so they added my pack to the list. Oh darn - looks like I'll have to go back and pick it up! ;^)
Of course the danger of being at the nursery without having to watch a toddler is that you can actually shop. I was still very good even with a wall of seed pack racks tempting me. The prettiest lettuce (four seasons) flashed its pretty blushing leaves at me and how could I resist that?! In the basket it went. It was then I also decided that 4 sq/ft of radishes was too much for DH and that I should get a foot or two for beets. I was lured in by the chioggia beets which look really cool when you cut them open - white and pink rings! So less radishes for DH and more beets for me. Heh. However I'm not so mean, I did get DH some Walla Walla Onion starts. He pouted like a little girl when I told him I hadn't planted any. I want to keep him happy so he finishes up some of my honey do list... ::cough:: potato bins ::cough:: As I was wandering around lusting over all the other beautiful (Hellebore) plants and garden ornamentation I wound up eavesdropping on a funny conversation three of the staff were having about whether or not mixing chocolate and mint was a tasty decision or not. They were laughing and being quite boisterous so it was hard to not over hear. One was adamant that mixing chocolate and mint was a crime against chocolate and should be outlawed. The others all thought her preference was shameful and she had no business making such outlandish laws governing the fate of those who make delicious concoctions of mint and chocolate. I laughed to myself and wandered on. Two rows of plants over I came across nothing other then : Lamiaceae Mentha x piperita f. citrata Chocolate aka Chocolate Mint. Which smells exactly like chocolate and peppermint! Yeah. It came home with me. Mmmmmm.
Now that there's a break in the rain and clouds looks like I might get a chance to put carrots and beet seeds in the garden. Off I go.
Oh and did I mention that my peas finally sprouted? Yay!
.75" rain for the week
Weather: 52.5 °F and Scattered Clouds
Humidity: 38%
Dew Point: 28 °F
Wind: 10.0 mph from the NW
Wind Gust: 18.0 mph
Saturday, March 28, 2009
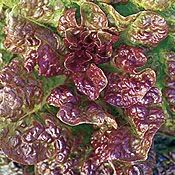
Four Seasons Lettuce
Four Seasons Lettuce
Lactuca sativa
Heirloom
6-10 in. Hardy Annual
A classic heirloom lettuce from France introduced before 1885, this round, red butterhead has incredible taste and reddish-brown outer leaves that cradle a creamy heart. Fast-maturing, all-season compact head. Easy to grow. Sow 2 seeds per inch directly into soil as soon as it begins to warm, 6-8 weeks before the last spring frost. For earlier plants, start indoors 4-6 weeks before transplanting into the garden. Enrich soil well with mature compost. Harvesting tips. Thin plants when they have 4 true leaves. Harvest outer leaves when young, entire head when mature.
Planting Depth: 1/4"
Soil Temp. for Germ.: 40-80°F
Days to Germ.: 2-15
Plant Spacing: 8-10"
Days to Maturity: 45-55
Full Sun/Partial Shade
Water Often
Pack weight .500gms
~ 450 seeds
Lactuca sativa: The purpose of our ongoing lettuce evaluations and seed productions is to enable the home gardener to grow tasty salads year-round with minimal effort. By utilizing different varieties of lettuces and different cultural practices, a fresh salad is never farther away than your garden.
CULTURE: Most lettuces are hardy, cool-season crops that can be planted as early as the soil can be worked. Many do best when the air temperature is between 60-70°F, and will germinate well at soil temperatures as low as 40°F. Choose heat tolerant varieties for summer plantings. Lettuce can be sown either directly into the garden or started indoors and transplanted. With succession plantings every 3 weeks, you can enjoy fresh salads all season. A cold frame and cold-hardy varieties can stretch the spring and fall growing season into the winter months. Optimum soil temperature range for germination: 40-75°F. Days to emergence: 2-15.
TO DIRECT SOW: Sow seed 1/4-1/2 inch deep, 1 inch apart, in rows 16-18 inches apart. Cover seeds lightly and firm gently. As soon as 2-3 true leaves have formed, thin loose-leaf types 10-14 inches apart and icebergs, bibbs, and romaines 12-16 inches apart.
FOR TRANSPLANTS: Sow 3-4 seeds per inch in sterile seedling mix 3 weeks prior to planting out. Transplant individual plants into pots or cell trays 2 weeks after sowing. Before planting outside, harden off for 2-3 days by reducing water and placing outdoors in a sheltered location. Leafy green vegetables require a moderately fertile soil. One cup of our complete fertilizer per 10 row feet will provide adequate nutrition.
INSECTS/PESTS: Most lettuce grows quickly, so pests aren't a problem. Aphids can be washed off with a strong spray of water, and slugs can be controlled with diatomaceous earth, slug baits, or traps.
HARVEST: During the warmer seasons, lettuce remains in prime eating condition for about 3 weeks. While picking individual leaves helps extend the season somewhat, all eventually become tough and bitter as they begin to bolt. We've found that rinsing lettuce under warm tap water can help reduce bitterness.
SEED SPECS: Minimum germination standard: 80%. Usual seed life: 3 years. Sampler will sow 15 row feet. Approximately 800 seeds per gram; 28 grams per ounce.
----------
PURCHASED: 1/2g from Seeds of Change via Garden Fever March '09. $2.99
STARTED SEED: 4/10/09. Sprouted 04/13/09. Three days. =)
HARDENED OFF:
TRANSPLANTED IN GARDEN:
DISEASE ISSUES:
INSECT ISSUES:
HARVEST YEILD & DURATION:
OTHER NOTES:
Chioggia Beets
Chioggia Beets
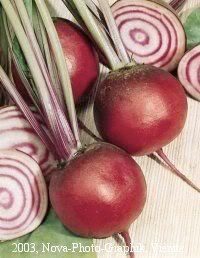
Italian heirloom. Round, exceptionally sweet roots have alternating concentric rings of cherry red and white. Shred fresh for salads. Cooked roots turn a lovely soft pink. Open pollinated. Heirloom. 55 days.
Beta vulgaris: Smooth skin, brightly colored interior and a sweet rich flavor are the traits that rate high in our beet trials.
CULTURE: Beets grow fairly well in almost any soil, but because of their extensive taproot, they prefer deep, moist, rich soil. Prepare the seedbed by working in 2-3 inches of compost or well-rotted manure prior to planting. Beets germinate in soils as cool as 45°F, and the seedlings are frost hardy, but the strongest plants emerge when soil is 55-70°F. In this range, emergence occurs in 5-14 days. At our research farm, we sow beets April through May. Below the seed furrow spread 1 cup of our complete fertilizer per 5-10 row feet. Plant 1 seed per inch, 1/2 inch deep, in rows at least 16 inches apart. Cover the seeds with sifted compost, loose soil, or vermiculite and water evenly. For uniformly sized beets, thin to 3-4 inches when the seedlings are 3-4 inches tall. Thinnings can be used as pot greens or in salads. Keep well watered especially during root development. The 5th and 6th leaf stage is the most critical time for beets to stress. Sudden changes in temperature or moisture will increase zoning (ring formation in the root) and leads to premature bolting. Starting beets indoors is not recommended.
DISEASES: Beets are susceptible to scab, the same disorder that affects potatoes. It causes brown rough spots on the skin. This can be prevented by making sure that your pH level is near neutral (7.0), rotating at least 2 years between potatoes and beets, and keeping your beets adequately watered.
HARVEST: Beets are usually harvested when they reach their desired size for table or canning use. Root size is controlled primarily by spacing and variety, rather than by maturity date. Store at 34°F and 100% relative humidity.
INSECTS/PESTS: Leaf miners cause blistered leaves and are best controlled by picking the infected leaves. Mice, moles, and gophers find beets tasty and sometimes can be discouraged by trapping or underground screens.
----------
PURCHASED: 5g from Nichols Garden Nursery via Garden Fever March '09. $2.25
STARTED SEED:
HARDENED OFF:
TRANSPLANTED IN GARDEN:
DISEASE ISSUES:
INSECT ISSUES:
HARVEST YEILD & DURATION:
OTHER NOTES: Try with this recipe, Chioggia beet and goat cheese tartlet after harvesting. It'll be lovely with fresh leeks from the garden too.
Aphids
I love reading other blogs and real life experiences. Other gardeners are so helpful! Here are a few tips I've picked up recently on aphids.
Our Engineered Garden
My friend Cat
" One of the most valuable pieces of information to me, was the fact that aphids, whiteflies, spidermites, and mealy worms are attracted to the color yellow. Yeah…just paint a stick yellow, coat it with some type of safe oil, then stick it in the ground beside your tomato plant. You’ll catch lots of these pests this way…."
Our Engineered Garden
"Have you tried whiteoil for aphids? that's what i normally use. It's vegetable oil water and a little bit of dishwasing detergent. You mix it up well and pop it in a hand pump spray bottle. the detergent acts as a cutting agent to mix the oil and water. Insects such as aphids have a basic respiratory system that requires them to breath through the "skin". Spraying the oil on them provides a air proof coating over them so they drop off and may or may not die, but it's reasonably effective and only takes a jiffy to mix up a batch. It's called white oil as the mixture looks white once you mix it up as the suds for little bubbles."
My friend Cat
Friday, March 27, 2009
Aw man... already?!
Really. It's ridiculously not fair. We're just getting started and I already have problems! ::sigh::
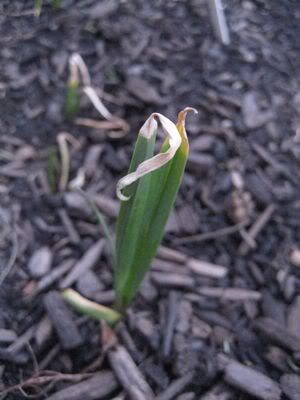
I guess that's what I get for just plunking store bought garlic in the garden last year. Turns out my lovely healthy garlic leaves all of a sudden decided to turn to white-ish, brownish, purple-ish mush. Looks like I have a case of Purple Blotch. ::insert menacing music here::
So it looks like my garlic was grown "in the South"... how I'm going to keep it dry is a mystery since I live in the PNW and all it ever does here is rain! Looks like I'm going to have to get/make some kind of cloche for them. Also conveniently enough DH was on his way to the hardware store so I rang him up and asked him to pick me up a bottle of Sulfur fungicide. Though he just called and can't find it. Crud. I'll have to go to the nursery tomorrow and see if they have a little jar of it.
Edited on 04/13/09. Annie's Granny had this to say about it (since she's having problems with her store bought overwintered garlic too....)
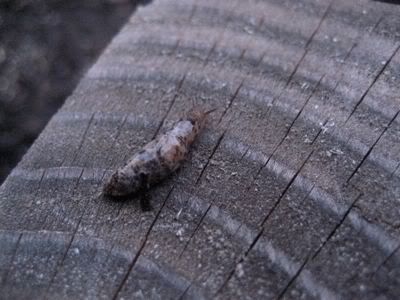
I'm also missing a lettuce start. ::grrrr:: Looks like it was chewed to the nub.
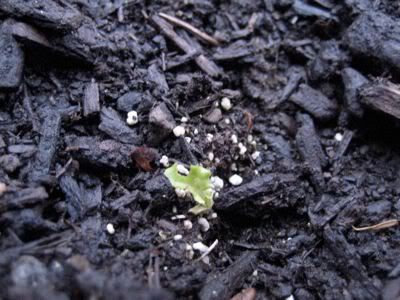
There are no slime trails and nothing really for any little buggies to hide under so I'm not sure. I figure I'll go out and look just as the sunsets or shortly thereafter to see if I can't find the little criminal.
Edited to add: Ah-ha! I found this little guy just moving in on the next start just at sundown. I had to inform him, "No shoes, no shirt, no service". Then I kicked him out.
**Source: The Garden Problem Solver; The Ultimate Troubleshooting Guide for Successful Gardening
I guess that's what I get for just plunking store bought garlic in the garden last year. Turns out my lovely healthy garlic leaves all of a sudden decided to turn to white-ish, brownish, purple-ish mush. Looks like I have a case of Purple Blotch. ::insert menacing music here::
"Purple blotch is a fungal disease that is most common in areas where plants are irrigated and in the South. The spores, which are spread by splashing water, overwinter in crop refuse and germinate in moist conditions.
SOLUTION: Use a fungicide to control this disease. To discourage purple blotch, remove crop debris and avoid growing in wet soil.
*Spray plants with garden sulfer, an organic fungicide, at the first sign of the disease, and repeat according to package directions.
*If sulfer is ineffective, remove the infected plant. At the end of the season, make sure no plant debris, where the spores can overwinter, remains in the garden.
*Discourage the disease by growing future onion family crops in well-drained soil and spacing plants to allow for air circulation.**

So it looks like my garlic was grown "in the South"... how I'm going to keep it dry is a mystery since I live in the PNW and all it ever does here is rain! Looks like I'm going to have to get/make some kind of cloche for them. Also conveniently enough DH was on his way to the hardware store so I rang him up and asked him to pick me up a bottle of Sulfur fungicide. Though he just called and can't find it. Crud. I'll have to go to the nursery tomorrow and see if they have a little jar of it.
Edited on 04/13/09. Annie's Granny had this to say about it (since she's having problems with her store bought overwintered garlic too....)
"Cornmeal Has Powerful Fungicidal Properties in the Garden
Using Cornmeal as an Organic Fungicide
Who would have thought that something as seemingly innocuous as cornmeal would have such potent fungicidal properties? Researchers at Texas A&M Research Station in Stephenville, TX, noticed that a peanut crop planted following a crop of corn didn’t suffer the usual fungus diseases. Further research showed that cornmeal contained beneficial organisms that were at least as effective as common chemical fungicides. Somehow cornmeal is able to attract a member of the Trichoderma fungus family, which is a good fungus that kills off disease causing fungi in a matter of weeks.
Howard Garrett, the Dirt Doctor, has continued the study and finds cornmeal effective on most everything from turf grass to black spot on roses. Furthermore, since it is entirely organic, it can be used on edible crops.
How To Apply
Dry: Work 2 pounds of cornmeal into the soil for every 100 square feet. Water well, to activate the fungus killing properties. One application per season is usually sufficient, but repeat applications won’t hurt anything.
Spray: What’s called ‘cornmeal juice’ can be made by soaking 1 cup of cornmeal in 1 gallon of water overnight. Strain the liquid and use as a spray on susceptible plants.
Cornmeal vs. Horticultural Cornmeal vs. Corn Gluten
Any type of cornmeal can be used as a fungicide.
Food grade cornmeal, found in grocery stores, will work just fine, but it is more expensive and comes in smaller quantities than horticultural cornmeal.
Horticultural cornmeal has not been stored under the stricter guidelines required for food grade cornmeal. Hort cornmeal is general used for livestock feed. It too will work just fine as a fungicide and it comes in bulk.
***Corn Gluten should not be used as a fungicide. Corn Gluten is cornmeal that has been processed to have a higher protein content. Iowa State researchers discovered that cornmeal gluten can inhibit seed germination. It is now used as a pre-emergent weed killer. That’s a great tip, but don’t confuse corn gluten with the fungicidal properties of corn meal.
A final bonus, cornmeal also appears to be a source of nutrients for the soil."
I'm also missing a lettuce start. ::grrrr:: Looks like it was chewed to the nub.

There are no slime trails and nothing really for any little buggies to hide under so I'm not sure. I figure I'll go out and look just as the sunsets or shortly thereafter to see if I can't find the little criminal.
Edited to add: Ah-ha! I found this little guy just moving in on the next start just at sundown. I had to inform him, "No shoes, no shirt, no service". Then I kicked him out.

**Source: The Garden Problem Solver; The Ultimate Troubleshooting Guide for Successful Gardening
Thursday, March 26, 2009
Yellow Crookneck Squash (Heirloom)
Yellow Crookneck Squash
Cucurbita pepo
Heirloom
8-9 in.
Easy-to-grow, bush, yellow summer squash has been a favorite for over 150 years. Abundant producer of yellow-skinned, white-fleshed summer squash that are delicious lightly steamed. Sow 2-3 seeds every 2-3 feet in rows 3-6 feet apart when danger of frost has passed. Thin to strongest plant. Can be sown indoors in pots, 2-4 weeks before the last frost, and transplanted very carefully. Enrich soil heavily with mature compost Harvesting tips. Harvest young, when 6-8 inches long. Harvest every other day when plant is producing heavily.
Planting depth: 1"
Soil temp for Germ.: 65-90°F
Days to germ.: 3-7
Plant Spacing: 3'
Days to maturity: 55
Full sun
Moderate water
Cucurbita spp.: Squash provides the home gardener a wide range of colors, shapes, flavors and culinary uses. Summer squashes, from the very brightest yellow to the darkest green, and winter squashes of all descriptions, bring endless enjoyment to the garden and the kitchen. In our breeding and selection work we look at many varieties, both new and old, to bring you the very best.
CULTURE: Squash and pumpkins prefer good fertile soil and plenty of sunshine. Start indoors or in a greenhouse 3 weeks prior to your last frost. Sow in a 3 inch peat pot or jiffy pot for direct transplanting. For best results transplant prior to the second set of true leaves. Work 1 cup of our complete fertilizer into the soil around each plant. For direct sowing, plant after your last frost and when the soil has warmed to at least 60°F. Optimum soil temperature for germination: 65-80°F. Days to germination: 5-10. Sow 1 inch deep and 24 inches between bush varieties, 36 inches between vining varieties. Squash needs just-barely-damp soils to germinate. Too much moisture causes the seed to rot. All squash are monoecious (bearing separate male and female flowers on the same plant), and require bee and insect activity for successful pollination. Poor fruit set is often the result of poor pollination.
INSECTS/PESTS: The major insect pests are the spotted and striped cucumber beetles, vine borers and squash bugs. Use row covers and/or apply Rotenone to reduce and control damage. Butternut varieties have a solid stem and are resistant to vine borer damage.
DISEASES: Squash are susceptible to a number of fungal, bacterial, and viral diseases that vary between regions. Your local county extension agent can help you pinpoint your particular problem.
HARVEST: Pick baby summer squash as well as the more mature ones. In general, summer squash are most tender and flavorful when very young. Winter squash are best left on the vine until fully mature. It should require quite a bit of pressure before your fingernail pierces through the rind into the flesh. For the best sugar content, cut the stem an inch or so from the body after the first light frost, and if the weather is dry, let them cure in the field. If temperatures drop below 25°F, bring your harvest inside and store in a cool dry location.
----------
PURCHASED: 1.75g from Seeds of Change via Portland Nursery Feb '09. $3.65
STARTED SEED: Planted seeds on 3/3/22. They came up on 3/25. Three days!
HARDENED OFF:
TRANSPLANTED IN GARDEN:
DISEASE ISSUES:
INSECT ISSUES:
HARVEST YEILD & DURATION:
OTHER NOTES:
Sweet Basil
Ocimum basilicum Our strain of Sweet Basil is a great culinary extravaganza, allowing several harvests over the season from 18 inch tall plants. Use leaves of all sizes in salads or to make pesto. Germination code: (1) Organic.
Herbs feed the palate and the soul! They add color and contrast to the landscape, perfume our homes, heal our wounds, and tantalize our taste buds. They are easy to grow. Whether in the garden or on the windowsill, learn their likes and dislikes, and you'll be rewarded with flavor and beauty.
CULTURE: Herbs grow best in well-drained fertile soils, so a garden bed that is well prepared with plenty of organic matter will increase your chances of success. Maintain a soil pH of 6.5. After seeding or transplanting, keep the soil moist and well weeded. Monthly feedings of a complete fertilizer will produce abundant foliage with maximum flavor.
HARVESTING: For fresh use, harvest as needed. For preserving, harvest at peak maturity. For distilling, harvest when blooms are just beginning to appear. At this point, the leaves contain the highest level of essential oils.
PRESERVING: Drying is the most common way to preserve herbs. Hang small bunches from the ceiling in a dry, dark location with good ventilation. Drying usually takes between 1-2 weeks.
STARTING HERBS FROM SEED: Start seed indoors 6-8 weeks prior to transplanting into the garden. Hardy seedlings can be transplanted after the last frost and tender types after June 1. Follow the guidelines below for the most success.
1. Good sanitation practices are the key to good germination and growth. Always use a sterilized growing medium and clean containers.
2. After you have sown the seeds, water them and cover the container with plastic or a clear dome lid. Remove the covering once germination is complete.
3. You must provide the proper warmth for germination. Never let the soil temperature go above 80°F or below 60°F.
4. Optimum seedling growth can be attained with indoor lighting fixtures in your home or greenhouse.
5. Seedlings transplant more successfully at a younger age. When the second set of true leaves appears, it's time to transplant. Don't allow them to become leggy or root bound. Small seedlings such as thyme, savory, and sweet marjoram may be transplanted successfully in small clumps.
6. Harden off seedlings before transplanting into the garden by gradually exposing them to fluctuating light and temperature.
GERMINATION CODES: Check the code at the end of the description for specific germination requirements.
(1): Germinates at temperatures between 60-75°F.
(2): Larger seeds need to be covered with soil at least as thick as the seed itself. May be slow and erratic to germinate.
(3): These seeds need a period of cold stratification for successful germination. Best results are obtained when the seeds are kept warm and moist for 2 weeks followed by temperatures of 33-35°F for 4-6 weeks or until germination starts.
(4): No special requirements, but germination may be slow and erratic.
BASIL: Ocimum basilicum: Growing basil can easily become an obsession. Once you have tasted basil, you are hungry for more, and soon discover the many varieties and different flavors. The word basil comes from basileus, the Greek word for king.
CULTURE: Do not be in a hurry to plant basil. Treat as a tender annual. Start seeds inside, 3-4 weeks before your last spring frost. Sow in sterile seedling mix and lightly cover seed with fine vermiculite. Inadequate light could result in seedlings becoming leggy. Optimum germination temperature: 70-75°F. Days to germination: 5-14. Fertilize lightly and grow at 62-65°F until planting outside. Plant 12-18 inches apart, in full sun, in rows 24-36 inches apart. Sowing outdoors is not recommended until nighttime temperatures are consistently above 50°F. The flowers range from white to shades of pink and purple and begin to appear from late July into August.
SEED SPECS: Minimum germination standard: 75%. Usual seed life: 3 years. Our basil is tested and found to be free of Fusarium, a potentially devastating disease for the basil grower.
----------
PURCHASED: 1/2g from Territorial Seed Co. Feb '09. $2.50
STARTED SEED: Planted seeds on 3/26. Sprouted 4/1/09. Six days.
HARDENED OFF:
TRANSPLANTED IN GARDEN:
DISEASE ISSUES:
INSECT ISSUES:
HARVEST YEILD & DURATION:
OTHER NOTES:
Aroma 1 Basil
In our continual search for better basil varieties, Aroma 1 is by far outstanding. This genovese type has the heavenly fragrance and flavor you'd expect in a fine basil with the added bonus of high disease resistance. Aroma 1 is also much more reluctant to go to flower than other varieties. Worthy of inclusion in the choicest pesto recipes. Germination code: (1)
Herbs feed the palate and the soul! They add color and contrast to the landscape, perfume our homes, heal our wounds, and tantalize our taste buds. They are easy to grow. Whether in the garden or on the windowsill, learn their likes and dislikes, and you'll be rewarded with flavor and beauty.
CULTURE: Herbs grow best in well-drained fertile soils, so a garden bed that is well prepared with plenty of organic matter will increase your chances of success. Maintain a soil pH of 6.5. After seeding or transplanting, keep the soil moist and well weeded. Monthly feedings of a complete fertilizer will produce abundant foliage with maximum flavor.
HARVESTING: For fresh use, harvest as needed. For preserving, harvest at peak maturity. For distilling, harvest when blooms are just beginning to appear. At this point, the leaves contain the highest level of essential oils.
PRESERVING: Drying is the most common way to preserve herbs. Hang small bunches from the ceiling in a dry, dark location with good ventilation. Drying usually takes between 1-2 weeks.
STARTING HERBS FROM SEED: Start seed indoors 6-8 weeks prior to transplanting into the garden. Hardy seedlings can be transplanted after the last frost and tender types after June 1. Follow the guidelines below for the most success.
1. Good sanitation practices are the key to good germination and growth. Always use a sterilized growing medium and clean containers.
2. After you have sown the seeds, water them and cover the container with plastic or a clear dome lid. Remove the covering once germination is complete.
3. You must provide the proper warmth for germination. Never let the soil temperature go above 80°F or below 60°F.
4. Optimum seedling growth can be attained with indoor lighting fixtures in your home or greenhouse.
5. Seedlings transplant more successfully at a younger age. When the second set of true leaves appears, it's time to transplant. Don't allow them to become leggy or root bound. Small seedlings such as thyme, savory, and sweet marjoram may be transplanted successfully in small clumps.
6. Harden off seedlings before transplanting into the garden by gradually exposing them to fluctuating light and temperature.
GERMINATION CODES: Check the code at the end of the description for specific germination requirements.
(1): Germinates at temperatures between 60-75°F.
(2): Larger seeds need to be covered with soil at least as thick as the seed itself. May be slow and erratic to germinate.
(3): These seeds need a period of cold stratification for successful germination. Best results are obtained when the seeds are kept warm and moist for 2 weeks followed by temperatures of 33-35°F for 4-6 weeks or until germination starts.
(4): No special requirements, but germination may be slow and erratic.
BASIL: Ocimum basilicum: Growing basil can easily become an obsession. Once you have tasted basil, you are hungry for more, and soon discover the many varieties and different flavors. The word basil comes from basileus, the Greek word for king.
CULTURE: Do not be in a hurry to plant basil. Treat as a tender annual. Start seeds inside, 3-4 weeks before your last spring frost. Sow in sterile seedling mix and lightly cover seed with fine vermiculite. Inadequate light could result in seedlings becoming leggy. Optimum germination temperature: 70-75°F. Days to germination: 5-14. Fertilize lightly and grow at 62-65°F until planting outside. Plant 12-18 inches apart, in full sun, in rows 24-36 inches apart. Sowing outdoors is not recommended until nighttime temperatures are consistently above 50°F. The flowers range from white to shades of pink and purple and begin to appear from late July into August.
SEED SPECS: Minimum germination standard: 75%. Usual seed life: 3 years. Our basil is tested and found to be free of Fusarium, a potentially devastating disease for the basil grower.
----------
PURCHASED: 1/4g from Territorial Seed Co. Feb '09. $2.40
STARTED SEED: Planted seeds on 3/26. Sprouted 4/1/09, six days. Noticed only a 66% germination rate. Not so hot.
HARDENED OFF:
TRANSPLANTED IN GARDEN:
DISEASE ISSUES:
INSECT ISSUES:
HARVEST YEILD & DURATION:
OTHER NOTES:
Magic Lantern Pumpkin
C. pepo 95 days. One of our best discoveries for Halloween pumpkins. Its heavy crown set will give you an early crop in plenty of time for Halloween. The dark orange fruit have medium ribbing, sit 16 inches tall, 12 inches wide, and weigh 16-24 pounds. The vigorous, compact vines fit well in smaller gardens and exhibit exceptional tolerance to powdery mildew. A real winner that's just right for kid picking! HV
Cucurbita spp.: A frosty field of bright orange pumpkins is a true sign of the harvest season. We offer the top varieties for holiday decoration, cooking, and exhibition.
CULTURE: Pumpkins have the same cultural needs as other members of the squash family. Refer to the Squash culture below, for direct sowing instructions. Starting transplants can give you earlier yields and prize winning pumpkins. Start transplants 3 weeks prior to your usual last frost. Use 3 inch peat or jiffy pots and grow with lots of light in a warm area. After they are up and growing well, move them to an outside cold frame. Hardening off for about a week makes a difference in their vigor after transplanting. After the danger of frost has passed, plant the entire peat or jiffy pot with no peat exposed to the air. Plant the bush or short-vine varieties in rows 6-8 feet apart with the plants spaced 3-4 feet apart in the row. Large-fruited varieties should be planted in rows 8-10 feet apart, with the plants spaced 4-5 feet apart in the row. Pumpkins and gourds require moderate to high levels of fertility. One cup of our complete fertilizer should be worked in around the plant when transplanting and another at the 4-6 leaf stage. Soil testing and liming to adjust pH can increase your success. Pumpkins and gourds require uniform irrigation totaling 15-20 inches of water during the growing season. Bee attractant flowers or beehives will help yields. Misshapen or non-developing fruit is often the result of poor pollination. All the gourds are vining varieties and can grow to 15 feet.
DISEASES: Pumpkins and gourds are susceptible to many of the common vine diseases, such as wilts, leaf spots and mildews, as well as several viral diseases. Common control measures include crop rotation, field sanitation, and fungicide applications. Consult your local county extension agent with specific problems.
INSECTS: Cucumber beetles and squash bugs can cause problems in squash plants. We've seen striped cucumber beetles turn healthy leaves into something that resembles a nylon sack in a matter of days. Dedicated use of Rotenone-Pyrethrin will help control the problem. Crop rotation can minimize problems with insects.
HARVEST: Exposure in the field to prolonged (1-2 weeks) temperatures below 50°F can result in chilling injury and lead to pumpkins and gourds rotting in storage. Pumpkins can be harvested after their rinds are hard and their skins have turned orange. Leave 3-4 inches of stem on the fruit since pumpkins without stems store poorly. Gourds should be allowed to mature as long as possible on the vine. To dry gourds, first wash gently in a solution of 10 parts water and 1 part bleach, carefully removing all dirt, then store in a warm, dry location. Pumpkins and gourds should be stored at 55-70°F and at 70% relative humidity.
SEED SPECS: Minimum germination standard: 75%. Usual seed life: 3 years. See individual varieties for seed count. There are 28 grams per ounce.
SQUASH
CULTURE: Squash and pumpkins prefer good fertile soil and plenty of sunshine. Start indoors or in a greenhouse 3 weeks prior to your last frost. Sow in a 3 inch peat pot or jiffy pot for direct transplanting. For best results transplant prior to the second set of true leaves. Work 1 cup of our complete fertilizer into the soil around each plant. For direct sowing, plant after your last frost and when the soil has warmed to at least 60°F. Optimum soil temperature for germination: 65-80°F. Days to germination: 5-10. Sow 1 inch deep and 24 inches between bush varieties, 36 inches between vining varieties. Squash needs just-barely-damp soils to germinate. Too much moisture causes the seed to rot. All squash are monoecious (bearing separate male and female flowers on the same plant), and require bee and insect activity for successful pollination. Poor fruit set is often the result of poor pollination.
INSECTS/PESTS: The major insect pests are the spotted and striped cucumber beetles, vine borers and squash bugs. Use row covers and/or apply Rotenone to reduce and control damage. Butternut varieties have a solid stem and are resistant to vine borer damage.
DISEASES: Squash are susceptible to a number of fungal, bacterial, and viral diseases that vary between regions. Your local county extension agent can help you pinpoint your particular problem.
HARVEST: Pick baby summer squash as well as the more mature ones. In general, summer squash are most tender and flavorful when very young. Winter squash are best left on the vine until fully mature. It should require quite a bit of pressure before your fingernail pierces through the rind into the flesh. For the best sugar content, cut the stem an inch or so from the body after the first light frost, and if the weather is dry, let them cure in the field. If temperatures drop below 25°F, bring your harvest inside and store in a cool dry location.
SEED SPECS: Minimum germination standard: 75%. Usual seed life: 3-4 years. Days to maturity: from date of direct seeding; if transplanting, subtract 10 days.
Seeds per gram listed below by type; 28 grams per ounce.
----------
PURCHASED: 3g from Territorial Seed Co. Feb '09. $3.75
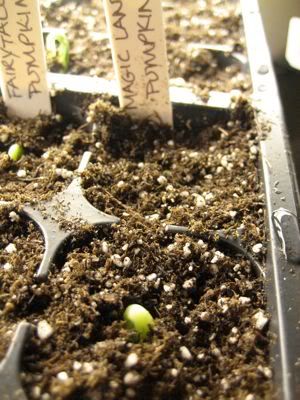
STARTED SEED: Planted seeds on 3/22. They came up on 3/24. Two days! How crazy is that?
HARDENED OFF:
TRANSPLANTED IN GARDEN:
DISEASE ISSUES:
INSECT ISSUES:
HARVEST YEILD & DURATION:
OTHER NOTES:
03/24/09
Cucurbita spp.: A frosty field of bright orange pumpkins is a true sign of the harvest season. We offer the top varieties for holiday decoration, cooking, and exhibition.
CULTURE: Pumpkins have the same cultural needs as other members of the squash family. Refer to the Squash culture below, for direct sowing instructions. Starting transplants can give you earlier yields and prize winning pumpkins. Start transplants 3 weeks prior to your usual last frost. Use 3 inch peat or jiffy pots and grow with lots of light in a warm area. After they are up and growing well, move them to an outside cold frame. Hardening off for about a week makes a difference in their vigor after transplanting. After the danger of frost has passed, plant the entire peat or jiffy pot with no peat exposed to the air. Plant the bush or short-vine varieties in rows 6-8 feet apart with the plants spaced 3-4 feet apart in the row. Large-fruited varieties should be planted in rows 8-10 feet apart, with the plants spaced 4-5 feet apart in the row. Pumpkins and gourds require moderate to high levels of fertility. One cup of our complete fertilizer should be worked in around the plant when transplanting and another at the 4-6 leaf stage. Soil testing and liming to adjust pH can increase your success. Pumpkins and gourds require uniform irrigation totaling 15-20 inches of water during the growing season. Bee attractant flowers or beehives will help yields. Misshapen or non-developing fruit is often the result of poor pollination. All the gourds are vining varieties and can grow to 15 feet.
DISEASES: Pumpkins and gourds are susceptible to many of the common vine diseases, such as wilts, leaf spots and mildews, as well as several viral diseases. Common control measures include crop rotation, field sanitation, and fungicide applications. Consult your local county extension agent with specific problems.
INSECTS: Cucumber beetles and squash bugs can cause problems in squash plants. We've seen striped cucumber beetles turn healthy leaves into something that resembles a nylon sack in a matter of days. Dedicated use of Rotenone-Pyrethrin will help control the problem. Crop rotation can minimize problems with insects.
HARVEST: Exposure in the field to prolonged (1-2 weeks) temperatures below 50°F can result in chilling injury and lead to pumpkins and gourds rotting in storage. Pumpkins can be harvested after their rinds are hard and their skins have turned orange. Leave 3-4 inches of stem on the fruit since pumpkins without stems store poorly. Gourds should be allowed to mature as long as possible on the vine. To dry gourds, first wash gently in a solution of 10 parts water and 1 part bleach, carefully removing all dirt, then store in a warm, dry location. Pumpkins and gourds should be stored at 55-70°F and at 70% relative humidity.
SEED SPECS: Minimum germination standard: 75%. Usual seed life: 3 years. See individual varieties for seed count. There are 28 grams per ounce.
SQUASH
CULTURE: Squash and pumpkins prefer good fertile soil and plenty of sunshine. Start indoors or in a greenhouse 3 weeks prior to your last frost. Sow in a 3 inch peat pot or jiffy pot for direct transplanting. For best results transplant prior to the second set of true leaves. Work 1 cup of our complete fertilizer into the soil around each plant. For direct sowing, plant after your last frost and when the soil has warmed to at least 60°F. Optimum soil temperature for germination: 65-80°F. Days to germination: 5-10. Sow 1 inch deep and 24 inches between bush varieties, 36 inches between vining varieties. Squash needs just-barely-damp soils to germinate. Too much moisture causes the seed to rot. All squash are monoecious (bearing separate male and female flowers on the same plant), and require bee and insect activity for successful pollination. Poor fruit set is often the result of poor pollination.
INSECTS/PESTS: The major insect pests are the spotted and striped cucumber beetles, vine borers and squash bugs. Use row covers and/or apply Rotenone to reduce and control damage. Butternut varieties have a solid stem and are resistant to vine borer damage.
DISEASES: Squash are susceptible to a number of fungal, bacterial, and viral diseases that vary between regions. Your local county extension agent can help you pinpoint your particular problem.
HARVEST: Pick baby summer squash as well as the more mature ones. In general, summer squash are most tender and flavorful when very young. Winter squash are best left on the vine until fully mature. It should require quite a bit of pressure before your fingernail pierces through the rind into the flesh. For the best sugar content, cut the stem an inch or so from the body after the first light frost, and if the weather is dry, let them cure in the field. If temperatures drop below 25°F, bring your harvest inside and store in a cool dry location.
SEED SPECS: Minimum germination standard: 75%. Usual seed life: 3-4 years. Days to maturity: from date of direct seeding; if transplanting, subtract 10 days.
Seeds per gram listed below by type; 28 grams per ounce.
----------
PURCHASED: 3g from Territorial Seed Co. Feb '09. $3.75
STARTED SEED: Planted seeds on 3/22. They came up on 3/24. Two days! How crazy is that?
HARDENED OFF:
TRANSPLANTED IN GARDEN:
DISEASE ISSUES:
INSECT ISSUES:
HARVEST YEILD & DURATION:
OTHER NOTES:
03/24/09

Fairytale Pumpkin
C. moschata 110 days. A unique eating and ornamental pumpkin, Fairytale has a deeply lobed, slightly squat shape and a magnificent mahogany brown color. A real eye-catcher in the field and at the market. Similar to Cinderella but more deeply ribbed, with a thick, strong handle. Numerous 12-18 inch fruit are borne on vigorous 10 foot vines. The flesh is deep orange and suitable for cooking and baking in pies. OP.
Cucurbita spp.: A frosty field of bright orange pumpkins is a true sign of the harvest season. We offer the top varieties for holiday decoration, cooking, and exhibition.
CULTURE: Pumpkins have the same cultural needs as other members of the squash family. Refer to the Squash culture below, for direct sowing instructions. Starting transplants can give you earlier yields and prize winning pumpkins. Start transplants 3 weeks prior to your usual last frost. Use 3 inch peat or jiffy pots and grow with lots of light in a warm area. After they are up and growing well, move them to an outside cold frame. Hardening off for about a week makes a difference in their vigor after transplanting. After the danger of frost has passed, plant the entire peat or jiffy pot with no peat exposed to the air. Plant the bush or short-vine varieties in rows 6-8 feet apart with the plants spaced 3-4 feet apart in the row. Large-fruited varieties should be planted in rows 8-10 feet apart, with the plants spaced 4-5 feet apart in the row. Pumpkins and gourds require moderate to high levels of fertility. One cup of our complete fertilizer should be worked in around the plant when transplanting and another at the 4-6 leaf stage. Soil testing and liming to adjust pH can increase your success. Pumpkins and gourds require uniform irrigation totaling 15-20 inches of water during the growing season. Bee attractant flowers or beehives will help yields. Misshapen or non-developing fruit is often the result of poor pollination. All the gourds are vining varieties and can grow to 15 feet.
DISEASES: Pumpkins and gourds are susceptible to many of the common vine diseases, such as wilts, leaf spots and mildews, as well as several viral diseases. Common control measures include crop rotation, field sanitation, and fungicide applications. Consult your local county extension agent with specific problems.
INSECTS: Cucumber beetles and squash bugs can cause problems in squash plants. We've seen striped cucumber beetles turn healthy leaves into something that resembles a nylon sack in a matter of days. Dedicated use of Rotenone-Pyrethrin will help control the problem. Crop rotation can minimize problems with insects.
HARVEST: Exposure in the field to prolonged (1-2 weeks) temperatures below 50°F can result in chilling injury and lead to pumpkins and gourds rotting in storage. Pumpkins can be harvested after their rinds are hard and their skins have turned orange. Leave 3-4 inches of stem on the fruit since pumpkins without stems store poorly. Gourds should be allowed to mature as long as possible on the vine. To dry gourds, first wash gently in a solution of 10 parts water and 1 part bleach, carefully removing all dirt, then store in a warm, dry location. Pumpkins and gourds should be stored at 55-70°F and at 70% relative humidity.
SEED SPECS: Minimum germination standard: 75%. Usual seed life: 3 years. See individual varieties for seed count. There are 28 grams per ounce.
SQUASH
CULTURE: Squash and pumpkins prefer good fertile soil and plenty of sunshine. Start indoors or in a greenhouse 3 weeks prior to your last frost. Sow in a 3 inch peat pot or jiffy pot for direct transplanting. For best results transplant prior to the second set of true leaves. Work 1 cup of our complete fertilizer into the soil around each plant. For direct sowing, plant after your last frost and when the soil has warmed to at least 60°F. Optimum soil temperature for germination: 65-80°F. Days to germination: 5-10. Sow 1 inch deep and 24 inches between bush varieties, 36 inches between vining varieties. Squash needs just-barely-damp soils to germinate. Too much moisture causes the seed to rot. All squash are monoecious (bearing separate male and female flowers on the same plant), and require bee and insect activity for successful pollination. Poor fruit set is often the result of poor pollination.
INSECTS/PESTS: The major insect pests are the spotted and striped cucumber beetles, vine borers and squash bugs. Use row covers and/or apply Rotenone to reduce and control damage. Butternut varieties have a solid stem and are resistant to vine borer damage.
DISEASES: Squash are susceptible to a number of fungal, bacterial, and viral diseases that vary between regions. Your local county extension agent can help you pinpoint your particular problem.
HARVEST: Pick baby summer squash as well as the more mature ones. In general, summer squash are most tender and flavorful when very young. Winter squash are best left on the vine until fully mature. It should require quite a bit of pressure before your fingernail pierces through the rind into the flesh. For the best sugar content, cut the stem an inch or so from the body after the first light frost, and if the weather is dry, let them cure in the field. If temperatures drop below 25°F, bring your harvest inside and store in a cool dry location.
SEED SPECS: Minimum germination standard: 75%. Usual seed life: 3-4 years. Days to maturity: from date of direct seeding; if transplanting, subtract 10 days.
Seeds per gram listed below by type; 28 grams per ounce.
----------
PURCHASED: 3g from Territorial Seed Co. Feb '09. $2.75
STARTED SEED: Planted seeds on 3/22. They came up on 3/24. Two days! How crazy is that?
HARDENED OFF:
TRANSPLANTED IN GARDEN:
DISEASE ISSUES:
INSECT ISSUES:
HARVEST YEILD & DURATION:
OTHER NOTES:
03/24/09
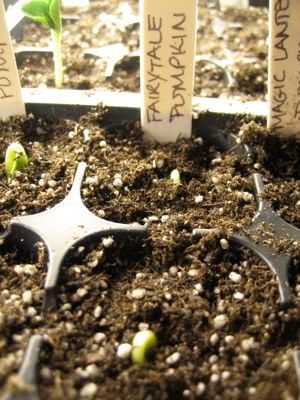

Tuesday, March 24, 2009
A little patience goes a long way.
While waiting for the world to rotate on its axis and bring us a bit closer to warmer weather and sunshine and flowers and a world that actually feels more like spring then winter I decided to cheat. I "planted" these three lovely flowers in the nasturtium bed. A little patience goes a long way. Apparently I don't have much of that - so HA! on you cold weather! There will be color in my garden in March whether or not you like it. (heehee) Actually my three year old loved them and how can I say no to her sweetness? Besides they were cheap. You can also see where I've set up the tomato cages in the far end of the bed and a few onion and garlic shoots sticking up in between... or maybe not, they're tiny but they're there - I promise! (See the white markers for them?)

For Christmas I also got a rain gauge which I've been wanting to install but couldn't figure out where till now. So many rules, no big trees, nothing tall around it but plants are okay, needs to be X# of inches above whatever you're attaching it to, etc. I figured at the foot of the bed would be good, it won't get knocked by the wheel barrow and it's pretty much going to tell me exactly how much rain my beds are getting. Nothing is really obstructing it. Otherwise anyone have any other ideas or thoughts on placement for successful accurate readings?
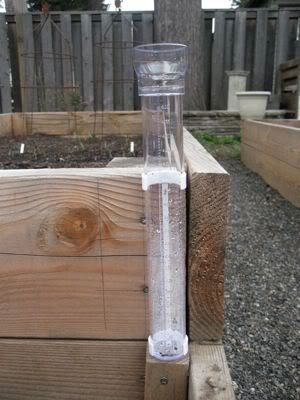
And you might've remembered me mentioning that I started some squash seeds a few days ago. I checked on them late this morning around 11 am or so and... just dirt. Went out this afternoon and come home about seven hours later - holy smokes would you look at that?!
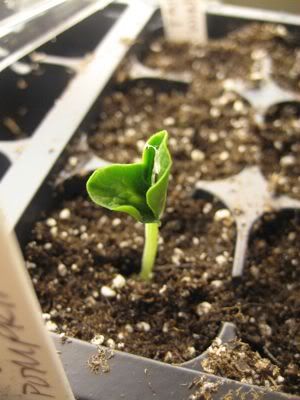
It was a good 1" tall! I'm such a proud mama. I love the squashes and gourds. Love them. This one is a small winter squash called Fairy. So far it seems magical to me!
Weather: 48.3 °F and Overcast
Windchill: 48 °F
Humidity: 72%
Dew Point: 40 °F
Wind: 2.0 mph from the SSW
Wind Gust: 10.0 mph
Fairy Squash
C. moschata 90 days. Fairy's got it all. It's early, prolific, disease resistant, storable, and delicious. The rambling plants set fruit early and continue to bloom over the long season, providing ample blossoms for stuffing. Manageably proportioned, oval fruit weighing 2-2 1/2 pounds have thick, honeyed flesh and smooth, green and golden streaked skin. Use for soups, pies, baked goods or whole, baked and stuffed as a show-stopping dinner presentation. HV
Cucurbita spp.: Squash provides the home gardener a wide range of colors, shapes, flavors and culinary uses. Summer squashes, from the very brightest yellow to the darkest green, and winter squashes of all descriptions, bring endless enjoyment to the garden and the kitchen. In our breeding and selection work we look at many varieties, both new and old, to bring you the very best. Heat-loving and requiring a long, sunny growing season to fully mature.
CULTURE: Squash and pumpkins prefer good fertile soil and plenty of sunshine. Start indoors or in a greenhouse 3 weeks prior to your last frost. Sow in a 3 inch peat pot or jiffy pot for direct transplanting. For best results transplant prior to the second set of true leaves. Work 1 cup of our complete fertilizer into the soil around each plant. For direct sowing, plant after your last frost and when the soil has warmed to at least 60°F. Optimum soil temperature for germination: 65-80°F. Days to germination: 5-10. Sow 1 inch deep and 24 inches between bush varieties, 36 inches between vining varieties. Squash needs just-barely-damp soils to germinate. Too much moisture causes the seed to rot. All squash are monoecious (bearing separate male and female flowers on the same plant), and require bee and insect activity for successful pollination. Poor fruit set is often the result of poor pollination.
INSECTS/PESTS: The major insect pests are the spotted and striped cucumber beetles, vine borers and squash bugs. Use row covers and/or apply Rotenone to reduce and control damage. Butternut varieties have a solid stem and are resistant to vine borer damage.
DISEASES: Squash are susceptible to a number of fungal, bacterial, and viral diseases that vary between regions. Your local county extension agent can help you pinpoint your particular problem.
HARVEST: Pick baby summer squash as well as the more mature ones. In general, summer squash are most tender and flavorful when very young. Winter squash are best left on the vine until fully mature. It should require quite a bit of pressure before your fingernail pierces through the rind into the flesh. For the best sugar content, cut the stem an inch or so from the body after the first light frost, and if the weather is dry, let them cure in the field. If temperatures drop below 25°F, bring your harvest inside and store in a cool dry location.
SEED SPECS: Minimum germination standard: 75%. Usual seed life: 3-4 years. Days to maturity: from date of direct seeding; if transplanting, subtract 10 days.
Seeds per gram listed below by type; 28 grams per ounce.
----------
PURCHASED: 3g from Territorial Seed Co. Feb '09. $4.55
STARTED SEED: Planted seeds on 3/22. They came up on 3/24. Two days! How crazy is that?
HARDENED OFF:
TRANSPLANTED IN GARDEN:
DISEASE ISSUES: Powdery mildew but it came back and didn't die like some of the other squash vines (pumpkin).
INSECT ISSUES: Face was mottled by something? Slugs? Seems eatable still.
HARVEST YEILD & DURATION: Harvested early October though could've gone longer if I let it. Great yeild. Two plants yielded about 14 squash.
OTHER NOTES:
3/24/09
7/27/09
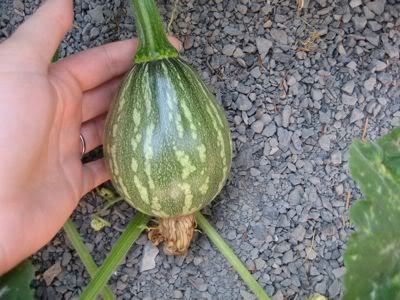

Small Sugar Pumpkin
Small Sugar Pumpkin
C. pepo 110 days. An heirloom, Small Sugar pumpkins have very smooth textured, bright orange flesh and the finest flavor for making mouthwatering pies. Vines develop 4-6 round, orange, slightly ribbed, 7 inch diameter scrumptious wonders. Organic. OP.
Cucurbita spp.: A frosty field of bright orange pumpkins is a true sign of the harvest season. We offer the top varieties for holiday decoration, cooking, and exhibition.
CULTURE: Pumpkins have the same cultural needs as other members of the squash family. Refer to the Squash culture below, for direct sowing instructions. Starting transplants can give you earlier yields and prize winning pumpkins. Start transplants 3 weeks prior to your usual last frost. Use 3 inch peat or jiffy pots and grow with lots of light in a warm area. After they are up and growing well, move them to an outside cold frame. Hardening off for about a week makes a difference in their vigor after transplanting. After the danger of frost has passed, plant the entire peat or jiffy pot with no peat exposed to the air. Plant the bush or short-vine varieties in rows 6-8 feet apart with the plants spaced 3-4 feet apart in the row. Large-fruited varieties should be planted in rows 8-10 feet apart, with the plants spaced 4-5 feet apart in the row. Pumpkins and gourds require moderate to high levels of fertility. One cup of our complete fertilizer should be worked in around the plant when transplanting and another at the 4-6 leaf stage. Soil testing and liming to adjust pH can increase your success. Pumpkins and gourds require uniform irrigation totaling 15-20 inches of water during the growing season. Bee attractant flowers or beehives will help yields. Misshapen or non-developing fruit is often the result of poor pollination. All the gourds are vining varieties and can grow to 15 feet.
DISEASES: Pumpkins and gourds are susceptible to many of the common vine diseases, such as wilts, leaf spots and mildews, as well as several viral diseases. Common control measures include crop rotation, field sanitation, and fungicide applications. Consult your local county extension agent with specific problems.
INSECTS: Cucumber beetles and squash bugs can cause problems in squash plants. We've seen striped cucumber beetles turn healthy leaves into something that resembles a nylon sack in a matter of days. Dedicated use of Rotenone-Pyrethrin will help control the problem. Crop rotation can minimize problems with insects.
HARVEST: Exposure in the field to prolonged (1-2 weeks) temperatures below 50°F can result in chilling injury and lead to pumpkins and gourds rotting in storage. Pumpkins can be harvested after their rinds are hard and their skins have turned orange. Leave 3-4 inches of stem on the fruit since pumpkins without stems store poorly. Gourds should be allowed to mature as long as possible on the vine. To dry gourds, first wash gently in a solution of 10 parts water and 1 part bleach, carefully removing all dirt, then store in a warm, dry location. Pumpkins and gourds should be stored at 55-70°F and at 70% relative humidity.
SEED SPECS: Minimum germination standard: 75%. Usual seed life: 3 years. See individual varieties for seed count. There are 28 grams per ounce.
SQUASH
CULTURE: Squash and pumpkins prefer good fertile soil and plenty of sunshine. Start indoors or in a greenhouse 3 weeks prior to your last frost. Sow in a 3 inch peat pot or jiffy pot for direct transplanting. For best results transplant prior to the second set of true leaves. Work 1 cup of our complete fertilizer into the soil around each plant. For direct sowing, plant after your last frost and when the soil has warmed to at least 60°F. Optimum soil temperature for germination: 65-80°F. Days to germination: 5-10. Sow 1 inch deep and 24 inches between bush varieties, 36 inches between vining varieties. Squash needs just-barely-damp soils to germinate. Too much moisture causes the seed to rot. All squash are monoecious (bearing separate male and female flowers on the same plant), and require bee and insect activity for successful pollination. Poor fruit set is often the result of poor pollination.
INSECTS/PESTS: The major insect pests are the spotted and striped cucumber beetles, vine borers and squash bugs. Use row covers and/or apply Rotenone to reduce and control damage. Butternut varieties have a solid stem and are resistant to vine borer damage.
DISEASES: Squash are susceptible to a number of fungal, bacterial, and viral diseases that vary between regions. Your local county extension agent can help you pinpoint your particular problem.
HARVEST: Pick baby summer squash as well as the more mature ones. In general, summer squash are most tender and flavorful when very young. Winter squash are best left on the vine until fully mature. It should require quite a bit of pressure before your fingernail pierces through the rind into the flesh. For the best sugar content, cut the stem an inch or so from the body after the first light frost, and if the weather is dry, let them cure in the field. If temperatures drop below 25°F, bring your harvest inside and store in a cool dry location.
SEED SPECS: Minimum germination standard: 75%. Usual seed life: 3-4 years. Days to maturity: from date of direct seeding; if transplanting, subtract 10 days.
Seeds per gram listed below by type; 28 grams per ounce.
----------
PURCHASED: 3g from Territorial Seed Co. Feb '09. $2.60
STARTED SEED: Planted seeds on 3/22. They came up on 3/24. Two days! How crazy is that?
HARDENED OFF:
TRANSPLANTED IN GARDEN:
DISEASE ISSUES:
INSECT ISSUES:
HARVEST YEILD & DURATION:
OTHER NOTES:
03/24/09
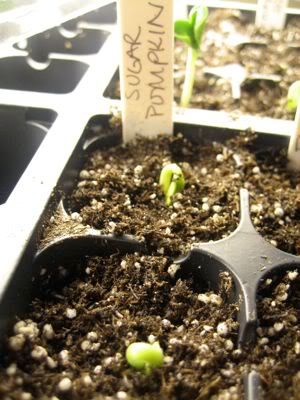

Monday, March 23, 2009
A walk around the grounds
Well the early tulips are starting to come up! It's so nice to see a blush of color in the garden again.
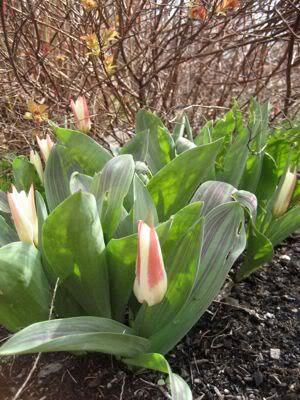
My tomato is lookin' good too! I was worried there with my enthusiastic feeding of the seedlings when they were probably too young to handle it. Right now though they're just growin' along at a good pace. I'm pleased too that they don't seem to be too leggy.
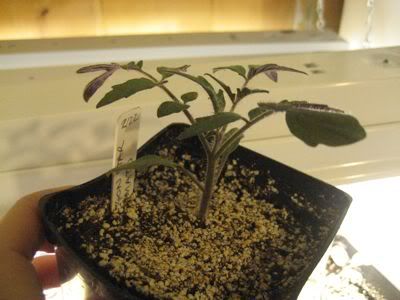
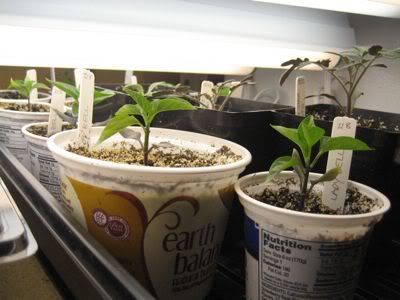
Even the "purple peppers" have become less purple and are doing well. ::g::
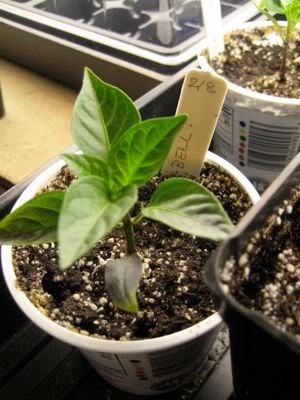
The blueberry bushes are starting to leaf out too, especially the southern highbush. The northern ones are still sleepy.
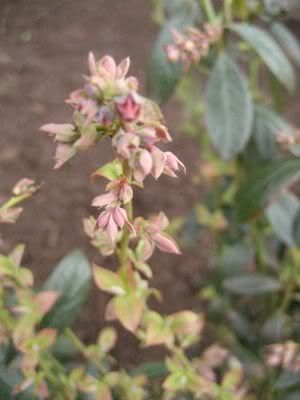
..and one of the pretty blooms on the little ornamental tree that borders our yard with the neighbor.
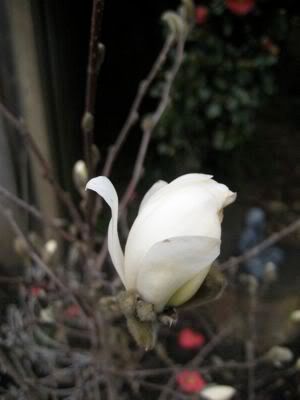

Organic Lawn Care
Ah lawns. The great "easy care" landscape that's more work then you'd imagine. I'm conflicted about lawns. While my eye does like the aesthetic break they provide with their low profile and open expanse, they do suck a lot of time, *water* and chemicals (generically speaking). The lawn is my last hold out for chemical application (of which my application is spotty at best; I'm quite inconsistent). I'd really like to change all that. While I don't have a lot of lawn (maybe 500sq/ft or less) it does require some attention. Sadly I've been ignoring my little patches of green and it shows. So my plan is to eliminate the chemicals and do a bit more hand weeding as needed and try this method of organic lawn care:
Source
"I visited a local reader and when he mentioned that he used worm castings on his lawn I asked for more info, please. So he wrote to tell me exactly what he puts on his good-looking lawn:
"WOW pre-emergence weed control" - this is basically 100% corn gluten with a slow nitrogen release, and I apply it with a hand-cranked hand-held spreader when the forsythia bloom each spring.
"100% Pure Earthworm castings" - again, I apply it with a hand-crank, hand-held spreader about a month after I’ve put down the corn gluten.
"Gardener’s Gold Premium compost" - goes down at the same time as the worm castings. (About every three years or so I’ll pick up a small 10-lb. bag of fish emulsion and I’ll mix that into the compost before I spread it onto the lawn).
Then he concluded: "And that’s it; that’s all I do for lawn care - I don’t apply anything else during the year. As I think I told you, I use no chemicals in this garden at all. I do mulch the fall leaves into the lawn with a mulching mower. I hand-weed throughout the growing season when/if necessary (and that’s pretty rare - the corn gluten really does suppress the weeds). I also keep my lawn high - I let it grow to 5 inches or so and then cut it down to three and a half inches - that keeps the sun off of the soil and helps discourage weed germination as well. In the hottest part of summer, if we’ve had no rain for 10 days I’ll give it a half inch of water via a sprinkler.
"I’m continuously mystified by the far more complex and expensive lawns regimens that I read and hear about."
And can I just say, his garden looks maaarvelous, and in no small part because he avoids a huge swath of lawn like the one you see here. His garden is mostly borders, and they’re filled primarily with conifers. The model of the sustainable garden looks good every day of the year, and costs the gardener very little in time or money."
Source
Sunday, March 22, 2009
O Fickle Spring!
I managed to get some of the transplants in the garden this morning... four different kinds of onions, broccoli and the mascara lettuce. Then, spring being what it is, the temp dropped to 40 and a dark and ominous cloud started spitting pea sized hail on me so I raised the white flag and quit for the day. I still have the green lettuce and the parsley to transplant. I guess they can wait till tomorrow.
On Saturday I got a few more onions planted along with another succession planting of spinach and radishes. Oh - the radishes I planted last week sprouted today too! This makes me happy because neither the spinach or the peas have done a darn thing. Buggars. Wake up little seeds! Haven't you heard? It's spring!
I also have conflicting information about when to start planting pumpkins and squash (both winter and summer). One guide says start now indoors another says to wait till late April, early May and plant from seed outside. Guess which one I'm going with? Oh yesssss - I LOVE PUMPKINS! So of course I started nine pumpkin plants in my starter tray this morning (I have room for exactly one - lol) and six winter squash (again room for just one!) and three summer yellow crook neck squash (yup you guessed it, room for just one.) I'm so silly. I think I might have to turn part of our yard into a pumpkin / squash patch this year since we can't afford to put in a patio anyway; might as well get something out of it, eh? Better then supporting a weed patch all summer! I figure if the seedlings don't work out or transplant well I'll just start new ones in the garden later...
As I recall my previous pumpkin transplants of years past worked out just fine... but I think I started them later then now too. I don't exactly remember. It's been four + years since I last had a veggie garden.
And have I mentioned how much I don't like flats for starts? Bah! The roots were a mess. Poor little dears, hope they survive that madness. Well, live and learn. At least the pumpkins and squash are being started in cells. I'll have some pictures tomorrow most likely. It was nice to actually see *plants* in my garden beds instead of just dirt!
Weather right now: 41.9 °F and Mostly Cloudy
Windchill: 42 °F
Humidity: 71%
Dew Point: 33 °F
Wind: 1.0 mph from the West
Wind Gust: 7.0 mph
Friday, March 20, 2009
Taters
Well my seed taters weren't quite ready to plunk into the ground on St. Patty's Day so I've left them on the window sill to sprout a little before hacking them up and putting them in the dirt. It's the great potato experiment this year. I've got potatoes I've started from seeds...
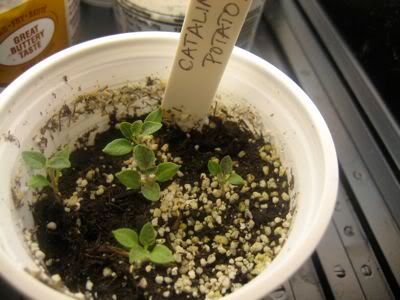
Seed potatoes from the nursery....
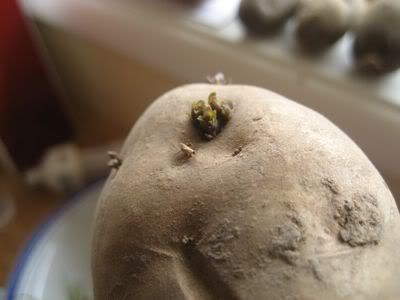
...and taters from the store...
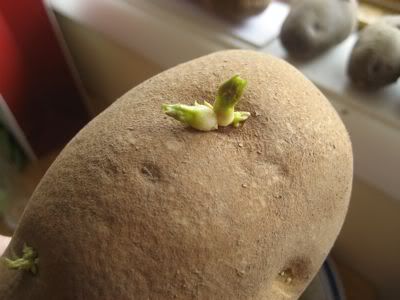
My plan was to put them in the ground on St. Patrick's Day but they weren't quite sprouted enough. Now my plan is for this Sunday when I put all the seedlings into the garden. I cut them up into little chunks this morning and set them back on the window sill on paper towels to dry out a little. I hear this will help keep them from rotting in the ground once they're planted.
My only hesitation is with the store bought potatoes as I'm not sure if they're carrying any diseases or how they've been treated... GMO's? Who knows? They were a cheap bag of spuds from Costco so I can just assume the worst. Heh.
Ideally I'd like a build as you grow potato bin (or two) like Sinfonian's but I didn't plan on it this year. I'll have to give it some good thought and try to figure out where I can tuck one of these maybe next year.
Coffee in the Compost
I would really like to thank Starbucks and all the caffeine addicted Portlanders that help my compost smell wonderful. Yesterday I picked up two bags of spent grinds from the local shop. Portland is one one of those places where a lot of people garden and the bins that hold these grounds are often empty. So needless to say I was quite happy to discover a Starbucks location that I guess isn't frequented by many gardeners because it seems they always have a bag or two for the taking.
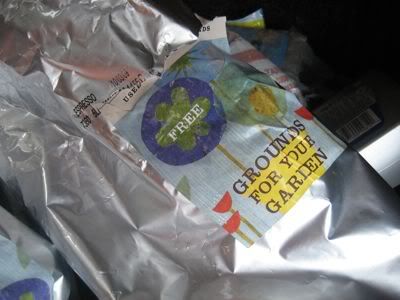
I've been reading a bit on the merits of coffee grinds vs. manure and have discovered the following.... (Please keep in mind this is from reading other blogs so I'm not sure the scientific verification of any of these - please take with a grain of salt.)
* Coffee is better because it lacks the pathogens that can be found in manure.
* Manure adds more salts to the compost.
* A well managed compost pile will get hotter with coffee then with manure.
* Coffee grinds attract more worms then manure. (Guess worms are little coffee junkies too!)
* Caffeine found in coffee is in fact the coffee plants natural insecticide and while most of it is leached out into the coffee during the brewing process, some remains and helps ward off garden pests. (This one I have to question - not sure that enough caffeine survives the brewing and composting process to make a difference.)
* Coffee beans are in fact a seed. Seeds are ounce for ounce more densely packed with nutrients and minerals then other plant materials, (they have to start a whole new plant from "scratch"!) therefore putting them in the compost makes your compost more "nutritionally" dense as well. (or something like that - heh)
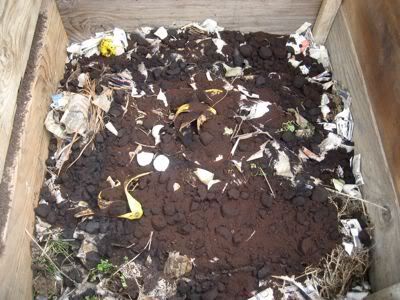
All that being said, I do love coffee in my compost. However gardeners have been using manure for millennia with much success and coffee's only been "around" for about 500 years. As long as you get your pile hot enough to kill the pathogens that might lurk there I'm all for manure in the pile too.
Happy Vernal Equinox everyone!
Happy Vernal Equinox everyone!
Yay! Winter has finally been banished for another year... well, at least according to the calendar. You'd never be able to tell by looking out the window. It's quite dark and overcast this morning, threatening a heavy rain. (At least it's warm enough now to banish the potential for snow today.)
In national gardening news I was quite pleased to hear about the Obama's putting in an 1,100 sq. veg garden, the first at the White House since Eleanor Roosevelt's victory garden during WWII. It will be used to not only feed the Obama's and their guests but help teach children about gardening and nutrition. (In a world that could stand a LOT of eduction on both) Kudo's to Michele Obama (who's spearheading this endeavor) I hear she's even going to make Barack pull weeds! lol
Of course good news is sometimes followed by bad which seems to be wrapped up in bill H.R. 875, Food Safety Modernization Act of 2009. It basically states that, ""any food establishment ... engaged in processing, packing or holding food for consumption in the United States" will have to register with a new Food Safety Agency and be subject to its regulations, as well as random regular inspections. Yes that means if I have too much zucchini coming out of my summer garden and I bring it to the neighbors I should expect a government agent to come knocking on my door. Gah! The zucchini police! Is this really what we need? No. I can understand want to crack down on large corporations that taint peanuts (etc) with pathogens but how will this effect farmer's markets and other small businesses or even the home garden enthusiasts? I really hope it gets reworked before, if, when it passes to make a provision for smaller businesses that can't stand the weight of more government regulation.
Wednesday, March 18, 2009
Already?
I bought a sage start at the nursery on a whim a few weeks ago. I thought I'd keep it in the kitchen on the sill for a bit of green in the house until after our last frost date before I put it out by the veggie garden. I don't really have any house plants - so I thought it would be nice to have a bit of green to look at till the weather warms up and I can hang out outside more. However temps in the house are pretty spring like or at least the aphids think so. I can't believe they found my *one* (temporary) houseplant and are sucking the life out of it. Ug! Where did they come from?!
I've been spraying the plant with water for the past three or so days since I first noticed them, with not much success. Fuzzy leaves make it hard to get the little buggars off. So today I put together a bottle of this organic herbicide / insecticide. I hope it does the trick! I'd hate to put this anywhere near the veggie garden. I don't need to start off the veggies at a disadvantage with an aphid infestation.
Anyone else have a recipe for an organic insecticide in case this one doesn't pan out?
Weather: 48.1 °F and Mostly Cloudy
Windchill: 46 °F
Humidity: 75%
Dew Point: 41 °F
Wind: 6.0 mph from the North
Wind Gust: 6.0 mph
Tuesday, March 17, 2009
Happy St. Patty's Day!
As gardeners we celebrate "the green" all year long and we all know how much luck it takes to get good yields. Heh. ;^)

see more Lolcats and funny pictures
"Dùnan math innearach, màthair na ciste-mine."
A good dungheap is mother to the meal chest.
Even in English I'm not sure what that means but it sounds like good compost = good eats. Oh how I love traditional Irish sayings. I think I'll go and plant my potatoes now.
Happy St. Patty's Day everyone!
Easter Egg II Radish
Easter Egg II Radish
28-32 days. Radishes in a rainbow of colors-red, white, and purple-all grow from the same packet. Excellent interior quality; these 3/4-1 inch globes remain firm, crisp, and tender well beyond the stated maturity. Great choice for the children's garden. An equal blend of Ruby, Plum Purple, and Snow Belle. OP
Raphanus sativus: Radishes grow best when sown in spring or late summer so they mature when days are shorter, sunlight is weaker, and temperatures are lower. Some varieties, like Cherry Belle and Easter Egg II, are more able to handle summer conditions. Modern breeders consider short tops desirable in radishes because small-topped plants can be spaced closer, resulting in higher yields. However, when the gardener does not spray repeatedly or use a crop row cover for flea beetle control, short tops are a serious liability.
CULTURE: Direct sow radish seed in the garden March through September. The season may be extended from October through February by sowing in cold frames or a greenhouse. Although they do better in moderately fertile soil, radishes will successfully mature almost anywhere. Prepare the bed by working compost into the top 2-3 inches of soil. Sow seeds 1/2 inch deep, and about a 1/2 inch apart, in rows 8-12 inches apart. Seedling will emerge in 4-11 days when the optimum soil temperature range of 45-80°F is achieved. It is essential to thin promptly to 1-2 inches apart in the row. Radishes have shallow root systems and need abundant water. Dry or crowded conditions will slow growth and make roots hot or pithy.
INSECTS: Flea beetle damage (pinholes in leaves) can reduce the growth rate and quality of radishes. Control heavy infestations by frequent spraying with a Rotenone-Pyrethrin spray or using an insect barrier or row cover such as Reemay or Grow Guard 20. Root maggot populations can also be reduced by using a row cover. You can reduce the amount of time (and therefore the damage) that root maggots have to invade the radish root by encouraging rapid growth, followed by prompt harvesting.
DISEASE: Almost completely disease-free.
HARVEST: Harvest promptly before they become pithy, split, or get hot. Make multiple sowings for a steady supply throughout the season. You can also let a few plants bolt or go to pod. Pick immature when they are 1/2 inch long for crunchy, mild radish pods. Keeps your salads and stir-fries spiced up all summer long. Store at 34°F and 95% relative humidity.
SEEDS SPECS: Minimum germination standard: 80%. Days to maturity calculated from date of direct seeding. Usual seed life: 4 years. Approximately 80 seeds per gram; 28 grams per ounce. A sampler will sow 7-8 row feet.
----------
PURCHASED: 1/2g from Territorial Seed Co. Jan '09. $2.85
DIRECT SEEDED: Set down seeds on 03/13/09.
DISEASE ISSUES:
INSECT ISSUES:
HARVEST YEILD & DURATION:
OTHER NOTES:
03/23/09
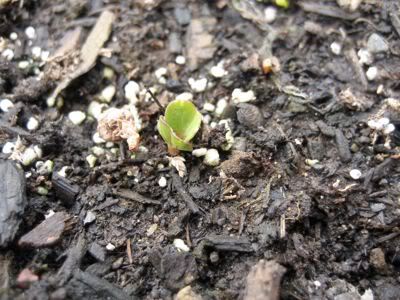
03/30/09
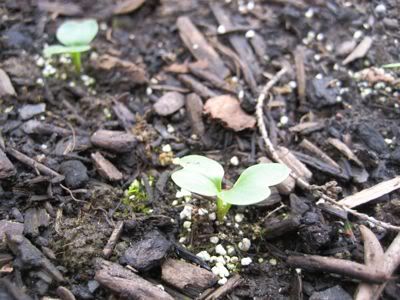

Victoria Lettuce
Victoria Lettuce
Organic
45 days. A rich green butterhead type of lettuce that forms an amazingly heavy, upright, open, 10 inch diameter head. The leaves are crisp, juicy, and sweet. Victoria also has a long harvest period and the ability to produce in hot weather without bolting or succumbing to bottom rot. OP.
Lactuca sativa: The purpose of our ongoing lettuce evaluations and seed productions is to enable the home gardener to grow tasty salads year-round with minimal effort. By utilizing different varieties of lettuces and different cultural practices, a fresh salad is never farther away than your garden.
CULTURE: Most lettuces are hardy, cool-season crops that can be planted as early as the soil can be worked. Many do best when the air temperature is between 60-70°F, and will germinate well at soil temperatures as low as 40°F. Choose heat tolerant varieties for summer plantings. Lettuce can be sown either directly into the garden or started indoors and transplanted. With succession plantings every 3 weeks, you can enjoy fresh salads all season. A cold frame and cold-hardy varieties can stretch the spring and fall growing season into the winter months. Optimum soil temperature range for germination: 40-75°F. Days to emergence: 2-15.
TO DIRECT SOW: Sow seed 1/4-1/2 inch deep, 1 inch apart, in rows 16-18 inches apart. Cover seeds lightly and firm gently. As soon as 2-3 true leaves have formed, thin loose-leaf types 10-14 inches apart and icebergs, bibbs, and romaines 12-16 inches apart.
FOR TRANSPLANTS: Sow 3-4 seeds per inch in sterile seedling mix 3 weeks prior to planting out. Transplant individual plants into pots or cell trays 2 weeks after sowing. Before planting outside, harden off for 2-3 days by reducing water and placing outdoors in a sheltered location. Leafy green vegetables require a moderately fertile soil. One cup of our complete fertilizer per 10 row feet will provide adequate nutrition.
INSECTS/PESTS: Most lettuce grows quickly, so pests aren't a problem. Aphids can be washed off with a strong spray of water, and slugs can be controlled with diatomaceous earth, slug baits, or traps.
HARVEST: During the warmer seasons, lettuce remains in prime eating condition for about 3 weeks. While picking individual leaves helps extend the season somewhat, all eventually become tough and bitter as they begin to bolt. We've found that rinsing lettuce under warm tap water can help reduce bitterness.
SEED SPECS: Minimum germination standard: 80%. Usual seed life: 3 years. Sampler will sow 15 row feet. Approximately 800 seeds per gram; 28 grams per ounce.
----------
PURCHASED: 1/2g from Territorial Seed Co. Jan '09. $2.85
STARTED SEED: Set down seeds on 03/13/09. Sprouts came up on St. Patty's Day! 03/17/09 - four days.
HARDENED OFF:
TRANSPLANTED IN GARDEN:
DISEASE ISSUES:
INSECT ISSUES:
HARVEST YEILD & DURATION:
OTHER NOTES:
03/23/09
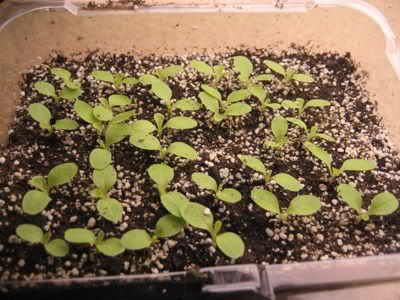

Lady Bugs!
How cool is this?! Here's the note I received back about my lady bug...
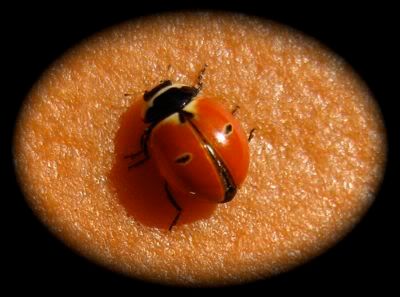

"This IS an exciting ladybug, but we don't believe it to be and Adalia bipunctata. Though two spotted ladybugs can vary a great deal, the spots do not have halos adn the pronotum and the head have variable patterns but not like this! Harrumph, right? Not too fast. We think this is a three-banded ladybug, Coccinella trifasciata subversa. The subversa means something like limited markings. The closest photo I can find to one like yours is this http://bugguide.net/node/view/208792. And if you read the fine print here it looks like yours would be a male. Coccinella trifasciata can have halos around their bands, and this species is one we are paying special attention to also. It seems to be disappearing like the others.
So, thank you indeed for a very special submission!
One note, though, even common ladybug submissions give us important data. Without them all we cannot determine how rare or how common any of them are. So don't hold back!
Thank you again. Please keep in touch and visit our website at www.lostladybug.org.
Rebecca Smyth
Lost Ladybug Project"
Sunday, March 15, 2009
It's the little things
Very exciting news here. I got to use my cold frames for the first time today - woot! I put the onions, lettuce and broccoli out into the (shaded) frames for an hour today to begin the hardening off process. Tomorrow I'll put them out there for two hours. They actually looked better and less stressed out then the day before much to my relief.
Went to the nursery today too and picked up flats with cells. I hope this is then the last of my watering and drainage issues I was having with using just flats because next week I can look forward to starting my pumpkins, summer squash and winter squash. My favorites!
Have I mentioned I *LOVE* the way tomato leaves smell? I thinned out the seedlings and kept just the two that will go in the garden. Hope I picked the right ones. 0.o
Oregon Sugar Pod Peas
Oregon Sugar Pod Peas
70 days. Easy to grow, non-climbing dwarf vines grow to approximately 30 inches tall and hold their pods up for easy picking. A prolific producer. The mild-flavored broad pods are 4-5 inches long, and frequently set in doubles. An Oregon State University development, Oregon Sugar Pod is highly disease and enation resistant. May be sown from February to late May in cooler climates. Should be planted every few weeks for continuous production. 68 Days, height 36 inches. OP
Pisum sativum: At Territorial, peas are of special value to us. Our region of the country is well adapted to growing peas, and many of the nation's most popular pea varieties, such as Oregon Sugar Pod II, were developed at Oregon State University. At our research farm, we conduct extensive trials to identify the best tasting and most productive offerings for shelling, snap, and edible pod peas.
CULTURE: A cool-season crop, peas will grow in a variety of soils provided the soil is well drained, in full sun, and contains a sufficient amount of organic matter to allow for good moisture retention. Peas may be sown as soon as the soil can be worked in the spring. They may be planted without rototilling by scratching out a shallow furrow and covering the seed. Sow seeds 1 inch apart, 1-1 1/2 inches deep, in rows 18-24 inches apart. Thinning is not necessary. Optimum soil temperature for germination: 45-75°F. Days to emergence: 6-14. Coat the seed with an inoculant to increase yields. Inoculant enhances early nitrogen-fixing bacterial nodes on the plant roots. Thinning is not necessary. Side dress plants with one cup of our complete fertilizer per 5 row feet along with 1 cup of bone meal per 10 row feet to foster healthy plants for a bountiful harvest. Climbing varieties must be trellised or planted by a fence. New pole-pea varieties in the US are in decline; the new developments are primarily bush types, which are suitable for mechanical harvest. Most bush-type vines can be supported on a short trellis or allowed to grow as a mound. Stress, such as prolonged hot weather or lack of moisture, will cause a higher percentage of off-type plants and reduced yields. We recommend mulching the roots and frequent ground watering (vs. overhead watering) to help keep the roots cool and productive.
DISEASES: Fusarium wilt (also called pea root rot) causes plant foliage to turn brown from the ground up. This can generally be controlled by crop rotation and sowing on well-drained ground. Choosing resistant varieties and ground watering can control powdery and downy mildews. Areas in the Northwest and Northeast are also prone to attacks of pea enation virus, which is spread by the peach aphids that hatch each summer. The virus causes 'windowing' or a mosaic appearance in the leaves, distortion of the pods, and reduced yields. If pea enation is a problem in your garden, we advise sowing enation-resistant varieties. The best control measures are using disease-free seed, selecting disease-resistant cultivars, and practicing crop rotation.
INSECTS: The pea aphid can be a destructive pea insect pest throughout the summer. Applications of Rotenone or Rotenone-Pyrethrin should be started at the seedling stage if leaf scalloping is observed.
HARVEST: Start checking for maturity as soon as the pods begin to swell. If left on the vine too long, the peas become starchy and the pods become tough. Most bush varieties are bred to mature all at the same time for a concentrated, once-over picking. Extend your harvest through multiple sowings. Store peas at 32°F and at 95% relative humidity.
Pea vine tendrils are an important ingredient in stir-fries, Asian salads, and garnishes. Market gardeners pick the top 6-8 inches of pea vines (tendrils) and sell them in bunches. Cascadia, Oregon Giant and Oregon Sugar Pod II were the favorites in trials conducted at Washington State University Extension.
SEED SPECS: Minimum germination standard: 80%. Days to maturity are calculated from the date of direct seeding. Usual seed life: 2 years. Approximately 90-165 seeds per ounce (average 125); 8 ounces per 1/2 pound.
----------
WHEN TO PLANT: You can sow early, mid-season, and late varieties on the same day, or make successive plantings of pea seeds throughout the cool weeks of early spring, but there's no point in sowing most kinds of peas later than two to three weeks before the frost free date, because the yield of peas maturing in warm weather seldom justifies the space they take. Young plants grow best at 59°F to 68°F. An exception is Wando, a good pea for those who must wait in the spring until their community gardens have been plowed.
For fall peas, plant seeds in later July or early August. Mature pea plants are more easily killed by frost than the hardier seedlings.
To put peas on your table, you must get them in the ground early and to do that you often need to prepare the row in the fall. Some gardeners even plant pea seeds in late fall or during a Feb. thaw. However, although it's safe to plant peas in cold soil, because they can sprout at temperatures as low as 40°F - though it could take them a month to do so - it's not wise to work in the garden while the earth is still heavily sodden. We get around this, here in our garden, by doing a late fall plowing, burying all the mulch and leaves and leaving rough mounds. Frost action pulverizes that exposed soil over the winter, and I find that I can usually get out there with a hoe in early March and pull open a furrow of fairly loose soil, going along the top of a ridge left by the plow, not in the deeper, colder valley between the ridges.
HOW TO PLANT: Shake some garden legume inoculant on the moistened seeds before planting. Plant peas thickly, about one every inch, and cover the seeds with 1- 1.5" of soil. Double rows of peas, spaced about 4-6" apart, make more efficient use of soil space then single rows. Wide rows of peas, up to 3' or so, are even more efficient. At one time, I thinned my peas to stand 2-4" apart, but since I've found that slight crowding doesn't seem to reduce production, I've stopped thinning them. Peas don't transplant well.
GROWING CONDITIONS: Pea roots are weak and small, easily dislodged in weeding, so I usually let some weeds grow, close to the plants, to prevent root damage and also to help share the pea roots, which prefer cooler growing weather. They also need plenty of oxygen, so plants grown in compacted or waterlogged soil will not produce as well as those in well aerated ground. Peas also prefer soil that is not highly acidic. They are fairly drought tolerant until flowering, when their moisture needs increase to an inch a week. The first peas appear about three weeks after blossoming.
STAKING: Except for leafless kinds like Novella, which is pretty much self supporting when grown in a triple row, your peas will need some support, even the low growing ones. Cuttings of brush that have lots of twigs are excellent for all kinds of peas and the best choice for wide rows. For tall growing vines like Sugar Snap and Mammoth Melting Sugar, grown in single rows, I supplement the brush with binder twine strung the length of the row between three steep polls. Netting, chicken wire, garden fencing and string supported by stakes are also successfully used by many gardeners.
More information on growing peas
----------
PURCHASED: Not sure where these came from... gift? They were packaged for 2008 so we'll see how they do.
DIRECT SEEDED: 03/13/09, inoculated and direct seeded. 04/06/09: Only about 1/4 of the seeds I planted sprouted. I dug up the duds to see what was going on - looks like they turned to rotten mush. We've had quite a bit of rain since I planted them. I didn't have any of these seeds left to replace the duds with so I added in Alderman Tall Telephone shelling peas instead. It might be nice to give them another vine to climb up - we'll see how that goes.
DISEASE ISSUES:
INSECT ISSUES:
HARVEST YEILD & DURATION:
OTHER NOTES:
Subscribe to:
Posts (Atom)