I will attempt to document my perennial plants here but because I started my garden four years before I started this blog this will continue to be a work in progress. I have a lot of plants! Sadly I don't always remember what I have and have forgotten the names of a few - so I will add to this this as I have time. Enjoy!
Common Name: Sunshine Dahlia
Botanical Name:
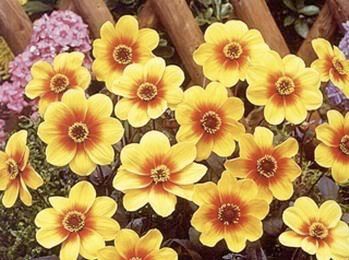
Planting Time: Spring (Feb-May)
Flowering Time: July till Frost
Light: Full Sun
Girth: 14" high x 12-20"
Soil:
Growth rate:
Prune: Dead head to promote more flower growth
Fertilize:
Other: Hardy in zones 8-10 otherwise dig up and overwinter in dry peat - plant again the following spring.
Common Name: Alfred Grille Dahlia
Botanical Name:
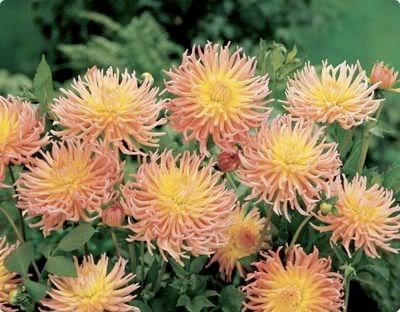
Planting Time: Spring (Feb-May)
Flowering Time: July till Frost
Light: Full Sun
Girth: 36" high x 12-20"
Soil:
Growth rate:
Prune: Dead head to promote more flower growth
Fertilize:
Other: Propagation Methods:
Common Name: Thomas A. Edison Dahlia
Botanical Name:
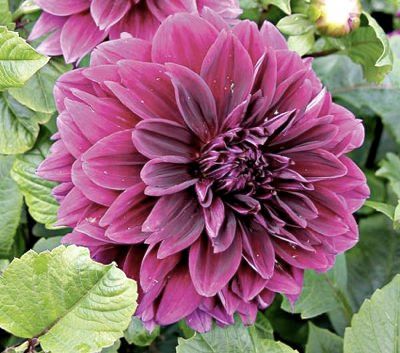
Planting Time: Spring (Feb-May)
Flowering Time: July till Frost
Light: Full Sun
Girth: 36" high x 12-20"
Soil:
Growth rate:
Prune: Dead head to promote more flower growth
Fertilize:
Other: Propagation Methods:
Common Name: Anemone 'Royale'
Botanical Name: 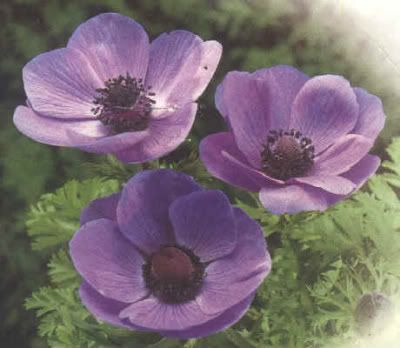 Planting Time: Flowering Time:
 Spring
Light: Girth: Soil:
Growth rate: Prune:Common Name: Autumn Fern
Botanical Name: Dryopteris erythrosora
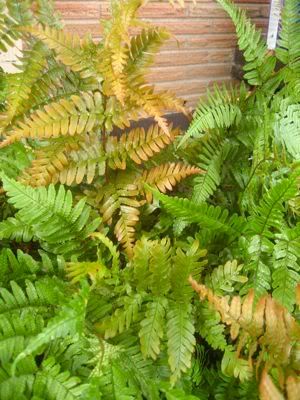 Planting Time: Flowering Time:
 No flowers, evergreen
Light: full shade / part shade
Girth: 18-24" high, 2' between plants
Soil: Plant in moist, rich, well drained soil in partial shade
Growth rate: Slow
Prune: In spring, when new fronds begin to unfurl, cut back spent foliage
Fertilize: Other: Common Name: Blue Star Creeper
Botanical Name: Laurentia fluviatilis
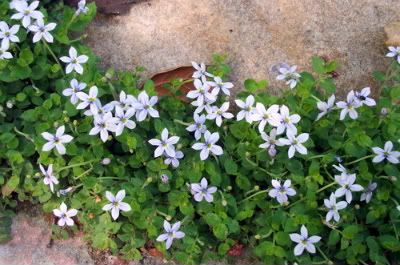 Planting Time: Flowering Time:
 May to Sept
Light: sun to partial shade
Girth: 2" high, spreading
Soil: Will tolerate most soils and foot traffic
Growth rate: Prune: Fertilize: Other: Propagation Methods: By dividing the rootball
Common Name: Bronze New Zealand Flax
Botanical Name: Phormium tenax 'Atropurpurea'
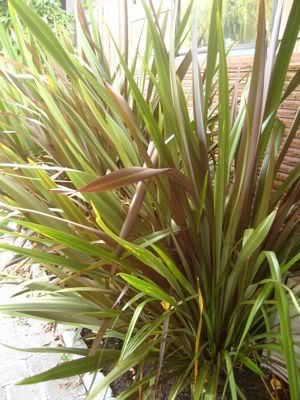 Planting Time: Flowering Time:
 late spring, evergreen
Light: full sun / partial sun
Girth: 6-8' high, 2' between plants
Soil: Plant in most any well-drained soil
Growth rate:Prune: Fertilize: Other: This is the red foliage form of the species and is one of the toughest of the New Zealand Flax - tolerates inland heat and colder temperatures than most of the hybrids.
Common Name: Christmas Fern
Botanical Name: Polystichum acrostichoides
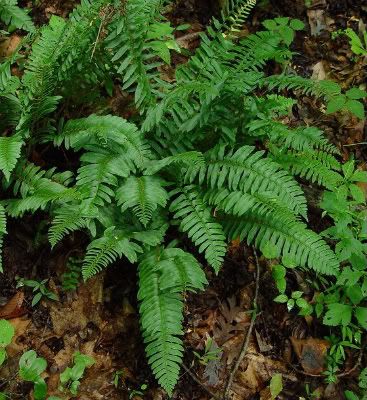 Planting Time: Flowering Time:
 No flowers, evergreen
Light: Partial shade / shade
Girth: 24" high, 24" apart
Soil: Prefers consistent soil moisture
Growth rate: Prune: Fertilize: Other: Native Americans used the rhizomes of the plant to make a tea for chills, fevers, pneumonia, and to induce vomiting.
Common Name: East Friesland Hybrid Sage
Botanical Name: Salvia nemerosa 'east friesland'
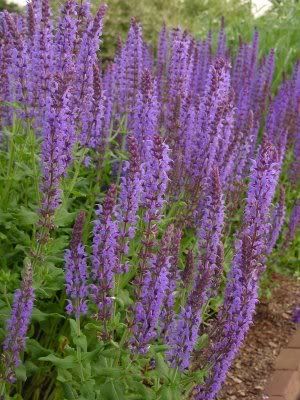 Planting Time: Flowering Time:
 Summer to Fall
Light: Full sun
Girth: 24" high, 18-24" spread
Soil: Semi Moist
Growth rate: Medium
Prune: To increase bloom time, it should be cut back after the first bloom. Propagate by division or cuttings in early summer.
Fertilize: Other: Tolerances: deer, drought, heat & humidity, seashore, and slope. ‘East Friesland’ is a magnet for butterflies, bees and hummingbirds and is deer-resistant. It is hardy for container gardening and provides excellent cut flowers.
Common Name: Golden Coral Bells
Botanical Name: Heuchera 'Amber Waves'
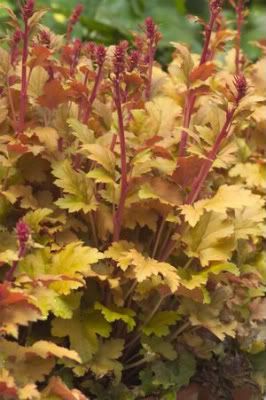 Planting Time: Flowering Time: Light:
 Part shade / They grow most vigorously and have the stongest colors when grown in partial shade (preferably afternoon shade)
Girth: 8" high, 17" wide
Soil: Moderately moist rich soil, good drainage and a neutral PH
Growth rate: Moderate (to slow if planted in full shade)
Prune: Fertilize: Other: Propagation Methods: By dividing the rootball or from herbaceous stem cuttings / Seed Collecting: N/A: plant does not set seed, flowers are sterile, or plants will not come true from seed. Heucheras can be grown under Black Walnut trees because they are resistant to the toxin Juglone which the trees emit from their roots. Heucheras are also salt tolerant. They are useful in the north along pathways which are salted in winter or for people gardening in coastal regions.
Common Name: Mediterranean Bells
Botanical Name: Nectaroscordum Siculum
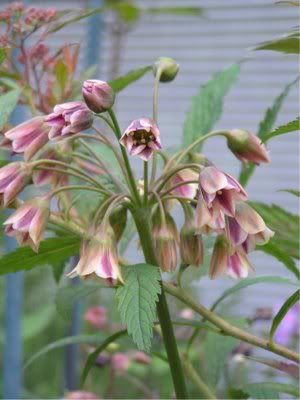 Planting Time:
 Sept. - Dec.
Flowering Time: May - June
Light: Sun / Partial Shade
Girth: 30" high, 4" between plants
Soil:
Growth rate: fast
Prune: Deadhead spent flowers, cut back leaves once they've browned completely
Fertilize: After the plant flowers
Other: Mulch overwinter to protect from severe frost
Common Name: Red Hot Poker, Poker Lilly, Torch Flower
Botanical Name: Kniphofia 'Coral Glow'
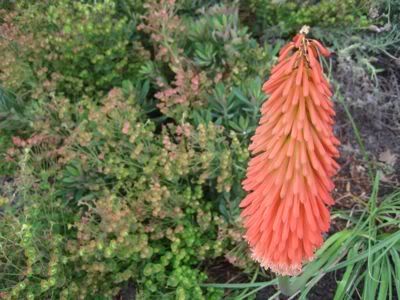 Planting Time: Flowering Time:
 Summer
Light: Sun, part shade
Girth: 3' high, 2' wide
Soil:
Growth rate: Prune: Fertilize: Other: Natives of Madagascar and tropical South Africa they were brought to England in 1707, and kept as greenhouse treasures until 1848, when someone had the bright idea of planting them outdoors, and their abiding hardiness was discovered. Heat and drought tolerant they are also loved by hummingbirds.
Common Name: Siberian Bugloss or Perennial Forget-me-not
Botanical Name: Brunnera macrophylla 'Jack Frost'
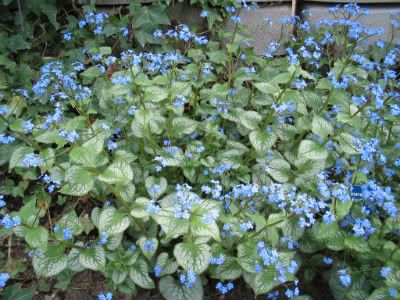 Planting Time: Flowering Time: Light:
 part shade / shade
Girth: 8-10" high, 12" between plants
Soil:
Growth rate:Prune: Fertilize: Other: A native of Siberia as the common name suggests, it is frost hardy and has large branched clusters of pale blue flowers which resemble the blooms of the hardy biennial Forget-me-not.
Common Name: Silver Mound
Botanical Name: Artemisia schmidtiana
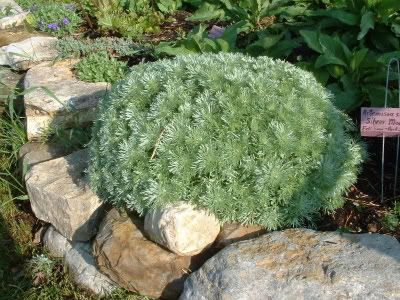 Planting Time: Flowering Time:
 No flowers
Light: Full sun / partial shade
Girth: 12" high, 12-18" wide
Soil: Plant in well drained soil. Excess water can cause root rot.
Growth rate: Prune: Cut the plant back to 1" (2.5 cm) at the end of the growing season or before growth restarts in the spring.
Fertilize: Other: The species is native to northern Japan and its island chains leading to Siberia. It is found in rocky sites in nature.
Common Name: Tulip 'Blue Diamond'
Botanical Name: Tulipa doulbe late
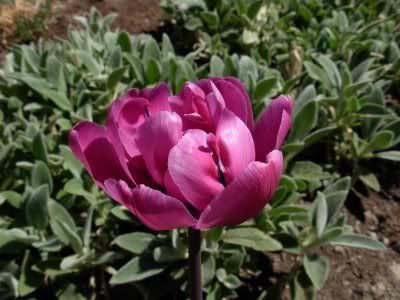 Planting Time:
 Sept. - Dec.
Flowering Time: April - May
Light: Sun / Partial Shade
Girth: 20" high, 4" between plants
Soil:
Growth rate: fast
Prune: Deadhead spent flowers, cut back leaves once they've browned completely
Fertilize: After the plant flowers
Other: Mulch overwinter to protect from severe frost
Common Name: Tulip 'Kikomachi'
Botanical Name: Tulipa (Triumph)
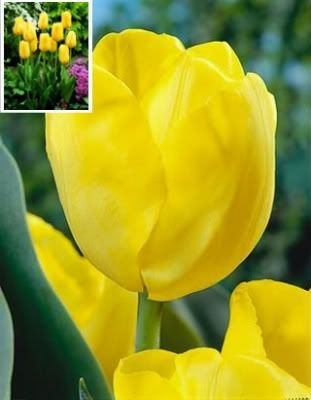 Planting Time: Flowering Time:
 Mid spring, Flowers are fragrant
Light: full to partial sun
Girth: 12" high / 6" - 9" between plants
Soil: 5.6 to 6.0 (acidic) / 6.1 to 6.5 (mildly acidic) / 6.6 to 7.5 (neutral) - well drained
Growth rate:Prune: Remove faded flowers, but do not cut back the stems before Autumn.
Fertilize: Other: DANGER: Parts of plant are poisonous if ingested Propagation Methods: By dividing rhizomes, tubers, corms or bulbs (including offsets). Seed Collecting: N/A: plant does not set seed, flowers are sterile, or plants will not come true from seed. Zones 4a to 10b
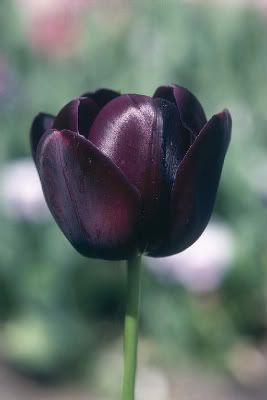
Common Name: Tulip 'Queen of Night'
Botanical Name: Tulipa single late
 Planting Time:
 Sept. - Dec.
Flowering Time: May
Light: Sun / Partial Shade
Girth: 24" high, 4" between plants
Soil:
Growth rate: fast
Prune: Deadhead spent flowers, cut back leaves once they've browned completely
Fertilize: After the plant flowers
Other: Mulch overwinter to protect from severe frost
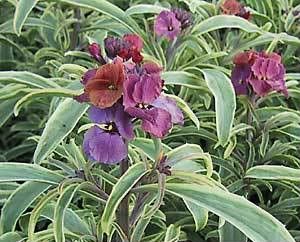
Common Name: Wallflower
Botanical Name: Erysimum linifolium 'Variegata'
 Planting Time: Flowering Time:
 May to August, evergreen
Light: Sun to part shade
Girth: 20" high, 20" wide
Soil: Good drainage, drought tolerant
Growth rate: Prune: Fertilize: Other: Propagation Methods: From softwood cuttings / Seed Collecting: N/A: plant does not set seed, flowers are sterile, or plants will not come true from seed


