Thursday, April 30, 2009

Oh the woes, will they ever end?

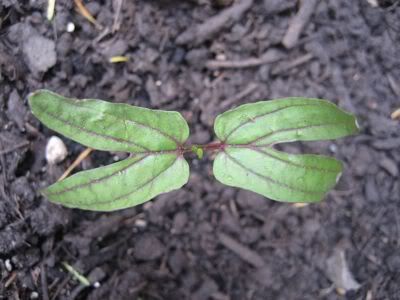
I really need to bust out the camera.  My green beans have finally started sprouting!  I'm pretty excited for them though I know I've still got a while to wait. heh.  

I also ripped out the last of the dying garlic shoots today.  So sad.  They were overcome by fungal disease.  They held up okay at first, especially since I was able to cloche them but then it was sunny for a while the cloches got recycled and we had another long wet spell that they sat through and it just did them in.  (The silver lining is my rain barrel is full again)  I did find starts today at the nursery so I bought about 18 of 'em.  I will not be without my garlic!  I'll have to rework the garden plan as I'm not going to attempt to put them in the same spot.  I'll just wind up with more sick garlic.  I think I can do a swap with either the peppers or basil spaces that are still sitting open waiting for the weather to warm up a bit more. 

It was also such a hectic frazzeling* day that I completely forgot a whole trey of starts I set out in the cold frame to start to harden off.  They should've been out there an hour.  Yeah, they were out there for seven.  I'm sure I've fried a few of them to a crisp.  At least the frame was closed so they won't suffer any wind burn.  It was good and warm today I hope I didn't cook 'em too much. ::feels much guilt for plant neglect::  I'm afraid to go visit them tomorrow for the sorry state I'm sure they'll be in.  

I've also started to think about the last little chunk of our property that needs some TLC and a redo.  It's pretty weedy and ugly right now.  I think I can squish into the 350 some odd square feet - 
A patio + furnature
A BBQ
A planter
A butterfly garden
A fruit tree (Self pollinating semi-dwarf apple or maybe a cherry or ???  I wanted to get a serviceberry but I think it might get to large for the space, so fruit tree it is)
A shade garden
A water fountain - bubbler?
Another rain barrel 
...and CHICKENS!

Yes I'm ambitious.  But it can be done!  Believe it or not I actually have a plan drawn up which does in fact encompass all of those things in that tiny little space.  I'll try to take a picture of it tomorrow.

Still not 100% on the chickens.  There are a lot of pros and cons to getting them so more research will need to be done.  I love the idea of them but not sure we'd gain all the benefits they'd provide.  (Yeah, I'm allergic to eggs - heh.)  Anyone have any personal recommendations about chickens = pro's, con's?  

PS: I've lived next door to chickens (and a stupid rooster) so I'm aware of the noise factor. ;^)  We are also zoned to have up to 3 chickens (roosters not allowed) without a permit as long as they're housed at least 50ft. away from any residential property.  I of course would also speak with the neighbors about it before we embarked down that path, etc.

*Frazzeling - my blog, my english. ;^)
Tuesday, April 28, 2009

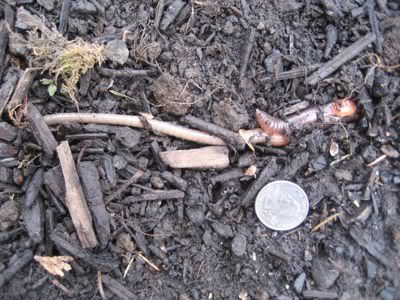
Worm Sex

Not much to report here. The beds are built, the pathways are laid and nearly everything has been planted. Now I just need to let it all grow! I did notice that the corn has come up. I'll give it a few more days and direct seed the duds that didn't show up. Can't go without my corn! I was also checking under the boards to see if the cilantro had sprouted yet. While I didn't find any sprouts I did find giant worms gettin' down and dirty. Yay for worm sex! I hope they have lots of little babies.  I tried to get a better shot but when I moved some of the chunky bits off the worms they retreated back into the soil.

Photobucket

We didn't get hardly and rain last week so I went out and watered everything really well on Monday. What happens? It starts raining Monday evening and hasn't let up since. Figures. It's supposed to be sunny and warm again starting Thursday. I'll be sure to get out and re-spray everything with the cornmeal tea again to keep the fungus issues at bay with all this moisture and water we've been getting. At least the rain barrel will be full again. ::g::

Weather: 49.0 °F with Light Rain
Windchill: 49 °F
Humidity: 82%
Dew Point: 44 °F
Wind: 0.0 mph
Wind Gust: 2.0 mph

Sunday, April 26, 2009

One thing done, on to the next!

ASPARAGUS
I received my second round of asparagus a couple of days ago and it really wasn't any less moldy then the first batch. However it did allow me to pick out the best of both batches to plant. I also took Granny up on her advice and soaked the first batch in chamomile tea which seemed to help them. Even just storing the one's I hadn't planted they perked up and were growing in my pretty dark cool basement. Those went into the garden! However I had two dozen left over so I wandered down to the neighbors house and gave her the left overs. She'd just put three raised beds in her front yard and was slowly converting her back yard to a useable space. She was planning on asparagus but hadn't quite got the bed prepped. I think they'll keep for a few weeks for her. She was pretty happy about it. I'm glad it could go to the neighbor. I'd rather that then a stranger on Craig's List... though that's still better then putting them in the compost bin!
Photobucket

HAPPY BIRTHDAY!
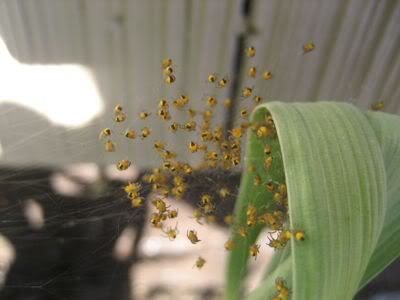
Looks like garden spider season has arrived. I've noticed little catches of these guys all over the yard. I hope I make a nice home for them. I need someone to eat the pests that are bound to show up sooner then later.
Photobucket

CORNMEAL TEA
The sulphur spray wasn't really cuttin' it on the garlic, which is pretty much a lost cause at this point. I'm going to pull it all. There are one or two hangers-on but really I'd like to start fresh. I'm just bummed because I can't find garlic anywhere! I guess I'm going to have to order some on-line. Anyway seems that I have fungal problems on more then just the garlic now. Onions are infected and the peppers have ring-spot. The morning glory I planted out in the yard is also showing some sort of fungal disease. So on to the next healing method - cornmeal tea. I soaked a cup of cornmeal in a gallon of water overnight and then sprayed the cornmeal water on my plants two days ago. Crazy. They're already looking perkier. Of course with only two days time it could just as easily be wishful thinking on my behalf. I really am hoping for the best. I think the best possible plan would be to have some warmer, sunnier, drier days! Why can't I just order up what I need from Mother Nature? She's so inconsiderate! ;^)

LANDSCAPING
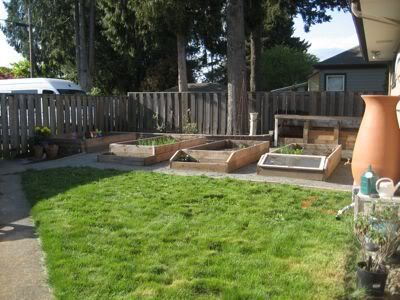
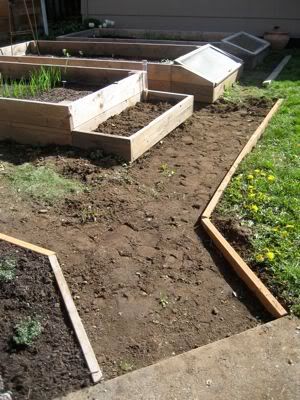
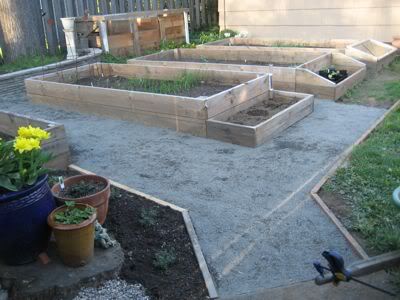
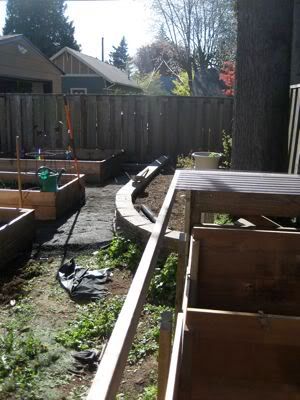
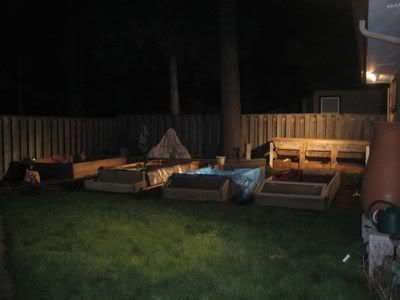
We finished laying down the 1/4" minus pathways around the beds this evening! Whew~ I'm so giddy about it I can't even begin to tell you. This was our backyard two years ago. It was dark and dreary and moldy. The apple tree on the left was completely diseased and most of the limbs were hollow. It also dropped all kinds of debris in the yard. As much as I hated to have it cut down it was necessary. The next big storm and a broken limb could've taken out the garage.

Photobucket
We've come along way! The pots on the left sit on the old tree stump. The pines were limbed up to let more light in and we removed the landscape bush to make way for the squash bed. There are now productive raised beds and easy to manage gravel pathways. I'm really tickled that at least 1/2 of our backyard is now an inviting functional space. Woot!

Photobucket

Thursday, April 23, 2009

The Good, the bad and the ugly

SWEET PEPPERS
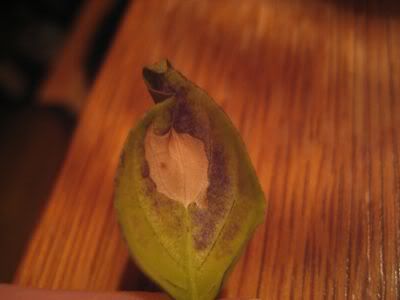
I finally figured out what was wrong with my sweet bell pepper plants - fungal ring spot! It's too damn damp in Oregon. Of course it probably doesn't help that I love the seedlings to death, literally. I think I've been overwatering them.

There was nothing to really indicate a fungal disease up until today. Then tonight when I was moving them out of the bedroom window and back into the kitchen for their morning sunbath I noticed an odd pattern on one of the leaves of an otherwise pretty healthy specimen.
Photobucket
I couldn't find anything describing this condition looking under ailments for peppers but found an *identical* image under columbines of all things. Then flipped through the book and noted several other similar images that corresponded pretty closely to my pepper leaf and they all said nearly the same thing: fungal - too damp/wet - plants spaced too close together, pick off infected leaves, etc... use a sulfur fungicide as an organic solution to the problem.

So tonight I sprayed a sulfur fungicide on them. We'll see how they do going forward. So far they've mostly been dropping their pale green leaves. I need to ignore them more! I put them back downstairs under the fake lights again. Time will tell. Oh and I'm locking up my watering can. Ha!

And just so this post isn't totally boring here are some lovely pictures.
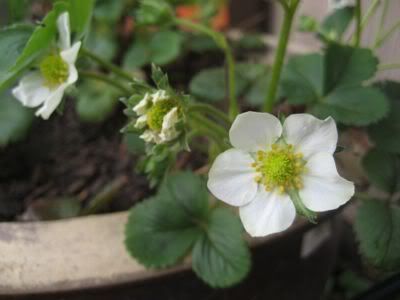
Soon to be a yummy strawberry!
Photobucket

The first round of radishes are startin' to get there!
Photobucket

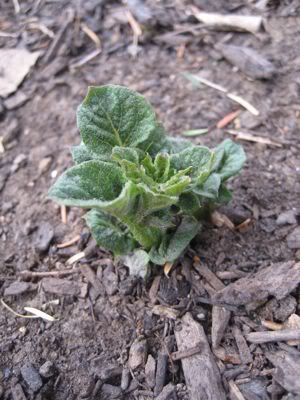
The potatoes have finally started to poke up. (Commerical russets first, then the true blue. Still waiting for Yukon Gold to make an appearance.)
Photobucket

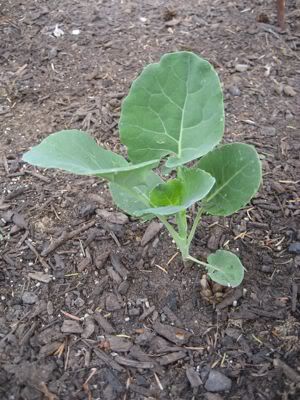
The broccoli is looking happy and healthy
Photobucket

Fairy wings for Granny. ;^)
Photobucket

Yellow Crookneck Squash is happy to be out in the garden and away from the fake lights.
Photobucket

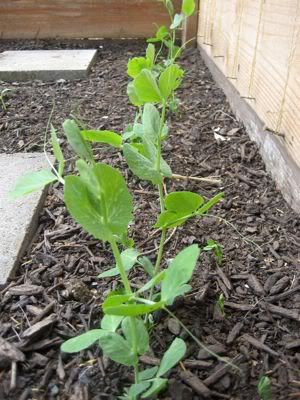
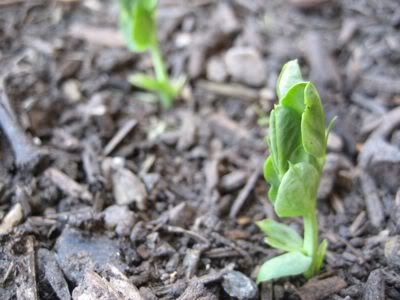
My peas! The few that came up from the first round look good; glad to see the second planting making their first appearance too.
Photobucket

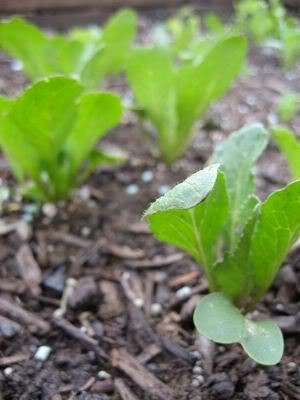
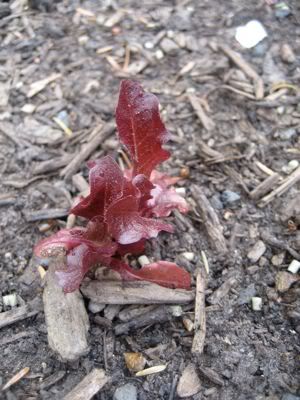
My pretty Mascara Lettuce is finally getting bigger. Love that the snails haven't bothered this variety at all. I wound up replacing the five Salad Bowl starts with some Four Seasons lettuce. We should be good for salads for a while now!
Photobucket

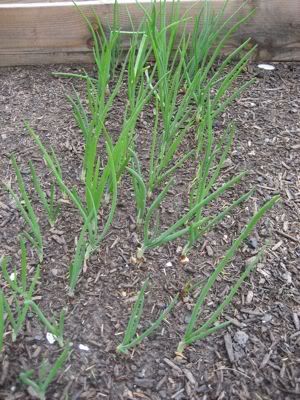
Onions. Yeah, they grow like nuts. What more can I say? ::g::
Photobucket

Flowers, chocolate mint and strawberries.
Photobucket

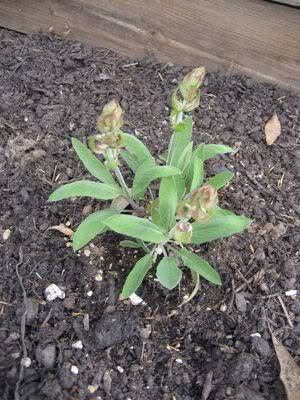
The sage seems to like its new home just fine. It looks like it's going through a little growing spurt, now that it's settling in.
Photobucket

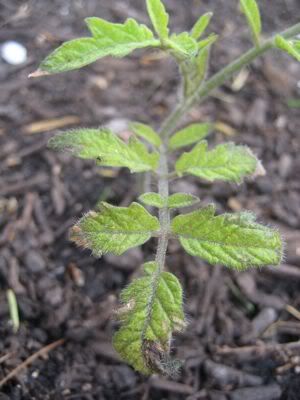
My sad looking Oregon Star tomato... I hope it springs back. I think the cooler weather we've been having has helped it a bit.
Photobucket

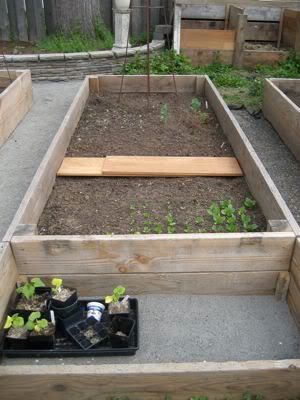
This is the bed with the green beans (no signs of sprouting yet), broccoli, potatoes, cilantro waiting to sprout under the board (they like it dark for germination), beets, radishes and various lettuce. Notice something missing? Yeah the glass over the cold frame at the foot of the bed. My wild toddler thought it would be fun to fling a rake though the air. Guess where it landed? Yup. Right through the window pane and into the radishes! Luckily no one was hurt... except for the cold frame. Looks like we'll have to replace the glass. Dang.
Photobucket

Tuesday, April 21, 2009

A whole lotta work!

LANDSCAPING
I have been a busy, busy girl since I last posted! Whew! It was sunny and gorgeous out this whole weekend! DH and I worked our butts off in the backyard both gardening and continuing the hardscaping project. It was so nice to get to be around him too. Seems so often we trade off kid duty so that one or the other can take care of some errand or project or whatever that we wind up not hanging out together as a family as much as I'd like. It was good that we were all working and playing together. It was the best way to get vitamin D too - tank top, shorts and a whole lotta sun.

Now I will have no weeds to pull between my beds! We laid down 1/4" minus pathways. Wet rock is *heavy*. I'm really sore and we only got it half done but still, so satisfying. It's a long slow work in progress...

BEFORE
Photobucket

AFTER
Photobucket

A WAYS TO GO STILL...
Photobucket

SWEET PEPPERS
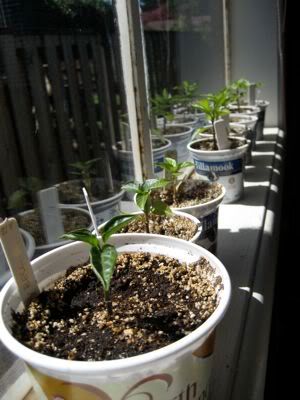
In other news I moved my languishing sweet peppers from the lights downstairs to the windows upstairs where it's not as bright (just natural sunlight) but a whole lot warmer. They seem to be doing much better. Their leaves are turning from a palish yellow/green to a deep rich green color. I'm so glad I moved them! Our warm temps are supposed to start to fade beginning tomorrow but I think I'll keep leaving them in the windows to see how they do.
Photobucket

COMPOST
I'm so excited! We mowed the law for the first time this weekend and I added all the clippings to my languishing (60°) compost pile on Saturday and turned the whole thing. I stuck the thermometer in the pile tonight and it looks like I've got a hot active pile now! ::g:: It's up to 100° I'm sure the warm dry weather didn't hurt matters either. It just makes me happy. Yes I'm a decomposition dork. Heh.

TOMATOES
I'm still pretty worried about the tomatoes. The edges are brown and crisp on some of the leaves. I don't know what's going on but I really hope they pull through. I planted them in the garden this weekend using the trench method. (Cut off all but the top two sets of leaves and bend and bury the stem and root system so it's only a few inches below the soil level. This keeps the roots much warmer as they're closer to the surface.) I've not tried this method before so we'll see how it goes. The starts weren't in the greatest condition to begin with so I hope they weather the shock of being transplanted. My other concern is that the designated spot for them is turning out to be the driest place in the whole garden.*

PEAS
The second round of peas that I started are all germinating pretty well - a much better rate then before! I'm so happy to see some of their little heads poke up. The one's I planted from the first round are also getting just big enough to start to grab onto the twine. I was able to wrap two of them to give them a start in the right direction.

SQUASH & CORN
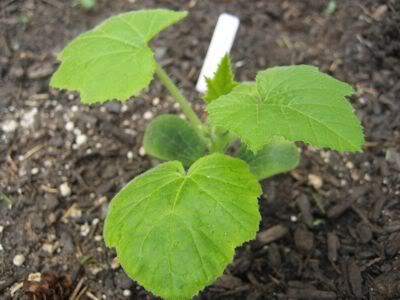
All of the squash went into the bed this weekend too. The cucs and corn might have been started a *wee* bit early but I'm just impatient that way. We'll see how they do and if need be start them again later. Pumpkin, yellow crook neck and my winter fairy squash are all nestled in place now too.

BLUEBERRIES
It was a pretty nice compliment to have the neighbor visit my yard and tell me my blueberry bushes have more blossoms on just one bush then she's ever had on any of hers. They are pretty laden. Now I just need to figure out if I should pick them all off or not. Of course I don't want to, but they're only two years old and it was suggested that fruiting should be nipped so the plant can put its energy into making a strong root system. Oh could I make myself wait a whole 'nother year?! I do loves me the blueberry preserves. Hum.... (will have to read up on that one)
Photobucket

RAIN BARREL & PARSLEY
I somehow managed to go though my entire 65 gallon rain barrel worth of water this weekend. (Granted it was hot - 90° out today) but it was nice to get a feel for how much water I might use this summer. I also was watering a bit excessively because I had a lot of tender new starts in the garden that weren't going to handle the heat without some sort protection. I wound up losing four of the tiny parsley starts that I germinated a bit too late I think. I might replace them with nursery starts when I get around to it.

FLOWERS
I was also able to get my nasturtiums in the ground, some from starts and some I tried direct seeding - we'll see how they both do. I also put the morning glory in. I was hesitant about this for several reasons - it's poisonous and I have a toddler + it's potentially invasive. I might be crazy. I guess I can rip it out if it starts to get out of hand or if my daughter gets it in her head that she can eat it. My marigolds didn't germinate as well as I was hoping but I don't have alot of room for them anyway so I guess I can find a spot or two for the two that did come up. I might have to seed some more and leave them in pots for the buggies to find. Also does anyone know if Zinnia's are a good companion plant?

I've also noticed that the flowers in the front are a bit more neglected with all the attention the veggie garden is getting, poor dears. The good news is that the Sluggo I picked up is helping a lot with the slug and snail damage that is usually so evident at this time already. My hosta's have big fat leaves! Who knew? And the Iris and other bulb leaves are nearly untouched too. How delightful. =)
Photobucket

FINAL THOUGHTS
I know I had more I wanted to say but it's late and DH is bugging me to turn off the computer - I'll be sure to get caught up with everyone tomorrow. Night!

*In case you don't know we had no garden last year - all the beds and everything we've done was pretty much started last fall except for the retaining wall for the blueberry bed which I started last summer. Before that our yard had pretty much been a weed patch for four years.

Saturday, April 18, 2009

This that and the other

Since it's pretty difficult to get much done in the garden while watching a toddler* I've got to take baby steps. I managed to get a tiny bit done Thursday afternoon.
Photobucket
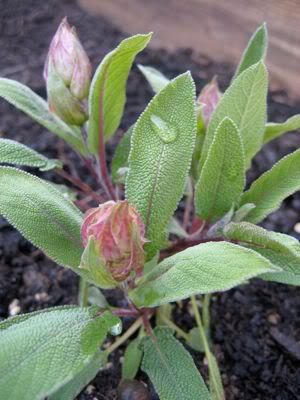
I cut the wood to edge this new little planting area and set it into the dirt. Then I proceeded to plant three thyme plants as a sort of ground cover in front of the pots (though the tags do say they can get to be 12" high, which comes right up to the top of the terracotta pot. Guess we'll find out by summer's end. I also found a smaller variety of sage which is the most lovely sage plant I think I've ever seen! I'm so happy with it. (This surely means I'll accidentally kill it somehow.) It's Salvia officinalis "Rubriflora', aka. pink flowered sage. I've never heard of it before and even a google search turned up nary a bit on it. I just loved how the unfolding leaves look like flowers themselves. This went into the new bed as well, toward the back. I hope there's enough room for it - it'll be close by the time it matures.
Photobucket
I was also able to pick up some parsley and plant that in the perennial bed as a companion for the asparagus.

I also hit up the nursery on Thursday and while it might not sound exciting I did get grab various soil amendments and talked to a guy who turned me on to some organic slug killer. Woot! I know, I lead a very dull life when this sort of thing makes me happy. I ran around sprinkling it everywhere. I have a bad case of snails. My poor hostas were holier then the Pope last year. I got a few plants too. Funny how their starts were so much bigger then mine. I must start my seeds earlier next year I think.

Today was really pretty productive too, though I actully neglected to take pictures. Maybe I'll try to get out there tomorrow with the camera.

I planted green beans and corn this afternoon from seed right into the garden. I also transplanted some of the more tender crops like tomatoes, pumpkins, squash, artichokes and the potatoes I started from seed way back when. The asparagus was soaked overnight in camomile tea (as per Granny's suggestion) to help rid it of the mold growing on it. I planted the ones that weren't (as) moldy into the beds. Out of 25 crowns I think there were maybe 10 or 11 that were okay. If I can get that many clean ones out of the next shipment I'll have enough to fill the space intended for them. In the meantime I might offer up the moldy crowns on Craig's List for free for anyone who wants to give it a shot. Heck - for free it can't hurt to plunk them in the ground if they've got the room for 'em.

I also worked a tiny bit more on hardscaping the back yard. I dug up some of the lawn and dug down a few inches, raked level and tamped flat a walkway area in front of the cold frame ends of the garden beds. I laid timber to divid the walk from the grass for easier maintenance. As soon as I'm able I'll take a trip to pick up some more 3/4" minus crushed gravel to fill the walkways in. This should make a nice very weed free path around all the beds (eventually).

*I gave her some bubbles to play with while trying to get the plants in the ground. What does she do? Drinks it when my head's turned for a fraction of a second. Ug! Yes I have poison control on speed dial. No they didn't think it would be an issue, drink lots of water, don't let her sleep for a few hours (in case she threw up, best if she was awake for that so as not to choke on her vomit) and call back if any alarming symptoms showed up. She knows not to drink it! We've told her a hundred times. Guess I should've told her 101. BTW she gacked over the toilet a few times later on but never did throw up. I'm hoping it all be out of her system by Monday.

Wednesday, April 15, 2009

+ & -

ASPARAGUS
+ My asparagus crowns were drop shipped from the grower and arrived on my door step this afternoon!
- The roots were bluey-green and covered in fungus.
+ I called Territorial Seed Co. and they comped me the order and said they'd have their grower send me another shipment. Hope the next one isn't moldy. Better late then never.
+ This just in: "this is just a quick email to let you know that I spoke to our supplier and they will be shipping out your replacement order tomorrow. It will ship via UPS (but it is sent from the east coast) so you will probably see it sometime mid-to-late next week. The supplier also said that a little mold in transit doesn't necessarily ruin the crowns, so if you have any extra space you might want to go ahead and plant your the crowns that you have. Thanks, TSC" I just think I already have enough problems with molds and fungus that I don't need to intentionally bring more in to my garden. What do you think? Should I plant any of these? Looks like about half of them are bad.

TOMATOES
+ It's getting to be time to plant the tomatoes in the garden.
- The heater incident really did my starts in much worse then I thought, they're a bit wilty and yellow with crispy edges. Yikes. I kept hoping they'd perk up a bit but it's not looking good.
- I only kept one of each of the tomatoes which means if these starts die I've got no back up but to go to the nursery and buy healthy starts, most likely not being able to find the varieties I'm interested in. Bah!
+ I've learned to have at least one extra of whatever I'm starting from seed in case I screw up again. Oh and to NEVER use the space heater around my starts again. Really. What was I thinking?

CARROTS
+ Some of the seeds are starting to sprout!

NEIGHBORS
+ The neighbor across the street stopped by and said how nice the front yard looks. =)
Photobucket
Photobucket
Photobucket
Photobucket
Photobucket

Monday, April 13, 2009

Chives

Chives
Allium schoenoprasum: A mild member of the onion family. The leaves and pink flowers are edible and add a fresh, mild, green-onion flavor to salads, potatoes, and other favorite recipes. Grow in clumps 12 inches apart. Germination code: (1) Perennial

Herbs feed the palate and the soul! They add color and contrast to the landscape, perfume our homes, heal our wounds, and tantalize our taste buds. They are easy to grow. Whether in the garden or on the windowsill, learn their likes and dislikes, and you'll be rewarded with flavor and beauty.

CULTURE: Herbs grow best in well-drained fertile soils, so a garden bed that is well prepared with plenty of organic matter will increase your chances of success. Maintain a soil pH of 6.5. After seeding or transplanting, keep the soil moist and well weeded. Monthly feedings of a complete fertilizer will produce abundant foliage with maximum flavor.
HARVESTING: For fresh use, harvest as needed. For preserving, harvest at peak maturity. For distilling, harvest when blooms are just beginning to appear. At this point, the leaves contain the highest level of essential oils.
PRESERVING: Drying is the most common way to preserve herbs. Hang small bunches from the ceiling in a dry, dark location with good ventilation. Drying usually takes between 1-2 weeks.
STARTING HERBS FROM SEED: Start seed indoors 6-8 weeks prior to transplanting into the garden. Hardy seedlings can be transplanted after the last frost and tender types after June 1. Follow the guidelines below for the most success.
1. Good sanitation practices are the key to good germination and growth. Always use a sterilized growing medium and clean containers.
2. After you have sown the seeds, water them and cover the container with plastic or a clear dome lid. Remove the covering once germination is complete.
3. You must provide the proper warmth for germination. Never let the soil temperature go above 80°F or below 60°F.
4. Optimum seedling growth can be attained with indoor lighting fixtures in your home or greenhouse.
5. Seedlings transplant more successfully at a younger age. When the second set of true leaves appears, it's time to transplant. Don't allow them to become leggy or root bound. Small seedlings such as thyme, savory, and sweet marjoram may be transplanted successfully in small clumps.
6. Harden off seedlings before transplanting into the garden by gradually exposing them to fluctuating light and temperature.
GERMINATION CODES: Check the code at the end of the description for specific germination requirements.
(1): Germinates at temperatures between 60-75°F.

----------
PURCHASED: 1/2g from Territorial Seed Co. $2.25
STARTED SEED: Good Friday 04/10/09. Sprouted 4/13/09. Three days!
HARDENED OFF:
TRANSPLANTED IN GARDEN:
DISEASE ISSUES:
INSECT ISSUES:
HARVEST YEILD & DURATION:
OTHER NOTES:

Zinnia - Dwarf Pumila Sprite / Mixed Colors

Zinnia - Dwarf Pumila Sprite / Mixed Colors
This attractive Zinnia produces cheerful flowers that face outward, rather then upward. A definite asset in arranging.

Days to Germinate: 6-10
Depth to sow: 1/4"
Seed Spacing: 4" - 5"
Plant Spacing: 10" apart
Growing Height: 18" - 24"
Type: Annual

The color and beauty of a flower garden can lift the spirit and renew the soul, and a bouquet of fresh cut flowers will bring sunshine into your home. Over the past few years, we have conducted extensive flower trials, concentrating on varieties that are easy to grow-many from direct-sowing-have superior color and fragrance, and make a good cut flower.

CULTURE: As a general rule, flowers can be sown in the garden when the soil has warmed to at least 55°F. Flower seeds sown outdoors germinate best in well-worked, loose-textured soil. Flowers respond to fertilizer and good watering practices. Add 1-2 cups of our complete fertilizer per ten row feet to provide adequate nutrition. Seeds should be buried two times their narrowest dimension and covered with finely raked soil or vermiculite unless otherwise noted. Some varieties can take over a month to germinate so mark your rows, keep them moist, and for larger seeds like sunflowers, use bird netting to deter your feathered friends. To encourage earlier blooms, many varieties can be started indoors or in a greenhouse. Always start with a sterile seedling mix and clean pots. Sow 5-6 weeks prior to your last frost. Most seeds germinate better if kept warm, 70-80°F, and covered with a sheet of plastic or a Propagation Dome to retain moisture. If seeds need darkness, cover with two sheets of newspaper. Remove the plastic or newspaper upon the first signs of germination. The most common mistake is over watering. Keep the soil moist, not soggy, and provide adequate drainage. A slight airflow helps reduce fungus problems such as damping off. We recommend feeding your seedlings a balanced grow formula, diluted to 1/4 strength. This will provide the right amount of nutrition for your young plants. Up-pot if necessary and transplant out after the danger of frost has passed.
For more information, please refer to the germination codes given for each variety, as well as the additional culture blocks throughout this section. Then enjoy a gorgeous display of blooms all summer long!
SOAKING: If you prefer to soak your seeds, follow these simple guidelines: soak in 85°F water for 1-3 hours and plant immediately. Longer soaking times are often detrimental; seeds need air to live.
PESTS AND DISEASES: Flowers are prone to some of the same diseases that we find in the vegetable garden. Proper sanitation, watering, and good weed control will generally alleviate most of the problems. Rotenone or Rotenone-Pyrethrin will control most insects.
HARVEST: For the best fresh-cut flowers, harvest in the morning when the flowers are their freshest and the petals are just opening. For optimum results, cut with a clean knife that has been dipped in a solution of 10% household bleach. A few drops of bleach in the vase along with our Floralife Cut Flower Food will prolong their beauty for days.
GERMINATION CODE: Given at the end of each description to give you specific information.
(1) Germination occurs between 70-85°F and within 6-15 days. Sow indoors and cover lightly.
(4) Direct sow in the garden as soon as the soil warms to at least 55°F.

----------
PURCHASED: 375mg from American Seed via The Dollar Store for $1.00
STARTED SEED: Good Friday 04/10/09. Sprouted 4/13/09. Three days!
HARDENED OFF:
TRANSPLANTED IN GARDEN:
DISEASE ISSUES:
INSECT ISSUES:
HARVEST YEILD & DURATION:
OTHER NOTES:

Zinnia - Lilliput

Zinnia - Lilliput
Beehive-shaped, mostly double blooms, measuring 1/2" - 1" in diameter. Blooms all summer.

Days to Germinate: 6-10
Depth to sow: 1/4"
Seed Spacing: 4" - 5"
Plant Spacing: 4" - 5" apart
Growing Height: 15" - 18"
Type: Annual

The color and beauty of a flower garden can lift the spirit and renew the soul, and a bouquet of fresh cut flowers will bring sunshine into your home. Over the past few years, we have conducted extensive flower trials, concentrating on varieties that are easy to grow-many from direct-sowing-have superior color and fragrance, and make a good cut flower.

CULTURE: As a general rule, flowers can be sown in the garden when the soil has warmed to at least 55°F. Flower seeds sown outdoors germinate best in well-worked, loose-textured soil. Flowers respond to fertilizer and good watering practices. Add 1-2 cups of our complete fertilizer per ten row feet to provide adequate nutrition. Seeds should be buried two times their narrowest dimension and covered with finely raked soil or vermiculite unless otherwise noted. Some varieties can take over a month to germinate so mark your rows, keep them moist, and for larger seeds like sunflowers, use bird netting to deter your feathered friends. To encourage earlier blooms, many varieties can be started indoors or in a greenhouse. Always start with a sterile seedling mix and clean pots. Sow 5-6 weeks prior to your last frost. Most seeds germinate better if kept warm, 70-80°F, and covered with a sheet of plastic or a Propagation Dome to retain moisture. If seeds need darkness, cover with two sheets of newspaper. Remove the plastic or newspaper upon the first signs of germination. The most common mistake is over watering. Keep the soil moist, not soggy, and provide adequate drainage. A slight airflow helps reduce fungus problems such as damping off. We recommend feeding your seedlings a balanced grow formula, diluted to 1/4 strength. This will provide the right amount of nutrition for your young plants. Up-pot if necessary and transplant out after the danger of frost has passed.
For more information, please refer to the germination codes given for each variety, as well as the additional culture blocks throughout this section. Then enjoy a gorgeous display of blooms all summer long!
SOAKING: If you prefer to soak your seeds, follow these simple guidelines: soak in 85°F water for 1-3 hours and plant immediately. Longer soaking times are often detrimental; seeds need air to live.
PESTS AND DISEASES: Flowers are prone to some of the same diseases that we find in the vegetable garden. Proper sanitation, watering, and good weed control will generally alleviate most of the problems. Rotenone or Rotenone-Pyrethrin will control most insects.
HARVEST: For the best fresh-cut flowers, harvest in the morning when the flowers are their freshest and the petals are just opening. For optimum results, cut with a clean knife that has been dipped in a solution of 10% household bleach. A few drops of bleach in the vase along with our Floralife Cut Flower Food will prolong their beauty for days.
GERMINATION CODE: Given at the end of each description to give you specific information.
(1) Germination occurs between 70-85°F and within 6-15 days. Sow indoors and cover lightly.
(4) Direct sow in the garden as soon as the soil warms to at least 55°F.

----------
PURCHASED: 375mg from American Seed via The Dollar Store for $1.00
STARTED SEED: Good Friday 04/10/09. Sprouted 4/13/09. Three days!
HARDENED OFF:
TRANSPLANTED IN GARDEN:
DISEASE ISSUES:
INSECT ISSUES:
HARVEST YEILD & DURATION:
OTHER NOTES:

Zinnia - Giants of California

Zinnia - Giants of California
Large fully double dahlia type flowers bloom on sturdy branching plants. Excellent for borders and unequaled as cut flowers. Blooms all summer.

Days to Germinate: 6-10
Depth to sow: 1/4"
Seed Spacing: 4" - 5"
Plant Spacing: 12" apart
Growing Height: 3'
Type: Annual

The color and beauty of a flower garden can lift the spirit and renew the soul, and a bouquet of fresh cut flowers will bring sunshine into your home. Over the past few years, we have conducted extensive flower trials, concentrating on varieties that are easy to grow-many from direct-sowing-have superior color and fragrance, and make a good cut flower.

CULTURE: As a general rule, flowers can be sown in the garden when the soil has warmed to at least 55°F. Flower seeds sown outdoors germinate best in well-worked, loose-textured soil. Flowers respond to fertilizer and good watering practices. Add 1-2 cups of our complete fertilizer per ten row feet to provide adequate nutrition. Seeds should be buried two times their narrowest dimension and covered with finely raked soil or vermiculite unless otherwise noted. Some varieties can take over a month to germinate so mark your rows, keep them moist, and for larger seeds like sunflowers, use bird netting to deter your feathered friends. To encourage earlier blooms, many varieties can be started indoors or in a greenhouse. Always start with a sterile seedling mix and clean pots. Sow 5-6 weeks prior to your last frost. Most seeds germinate better if kept warm, 70-80°F, and covered with a sheet of plastic or a Propagation Dome to retain moisture. If seeds need darkness, cover with two sheets of newspaper. Remove the plastic or newspaper upon the first signs of germination. The most common mistake is over watering. Keep the soil moist, not soggy, and provide adequate drainage. A slight airflow helps reduce fungus problems such as damping off. We recommend feeding your seedlings a balanced grow formula, diluted to 1/4 strength. This will provide the right amount of nutrition for your young plants. Up-pot if necessary and transplant out after the danger of frost has passed.
For more information, please refer to the germination codes given for each variety, as well as the additional culture blocks throughout this section. Then enjoy a gorgeous display of blooms all summer long!
SOAKING: If you prefer to soak your seeds, follow these simple guidelines: soak in 85°F water for 1-3 hours and plant immediately. Longer soaking times are often detrimental; seeds need air to live.
PESTS AND DISEASES: Flowers are prone to some of the same diseases that we find in the vegetable garden. Proper sanitation, watering, and good weed control will generally alleviate most of the problems. Rotenone or Rotenone-Pyrethrin will control most insects.
HARVEST: For the best fresh-cut flowers, harvest in the morning when the flowers are their freshest and the petals are just opening. For optimum results, cut with a clean knife that has been dipped in a solution of 10% household bleach. A few drops of bleach in the vase along with our Floralife Cut Flower Food will prolong their beauty for days.
GERMINATION CODE: Given at the end of each description to give you specific information.
(1) Germination occurs between 70-85°F and within 6-15 days. Sow indoors and cover lightly.
(4) Direct sow in the garden as soon as the soil warms to at least 55°F.

----------
PURCHASED: 375mg from American Seed via The Dollar Store for $1.00
STARTED SEED: Good Friday 04/10/09. Sprouted 4/13/09. Three days!
HARDENED OFF:
TRANSPLANTED IN GARDEN:
DISEASE ISSUES:
INSECT ISSUES:
HARVEST YEILD & DURATION:
OTHER NOTES:

Spring

I've started hardening off some of the more tender plants... it really must be spring. My tomatoes have been visiting the cold frame! I maybe pushing it a week early... especially looking at our forecast. It's been a much colder winter/spring then we normally have. I might harden them off and just leave them in the cold frame for a while at the end of this week unless the weather looks promising. Our average last frost date is 4/15 while the safe date is 4/26. I'd hate to have put in all the time and love just to have a frost kill them before we really get goin'!

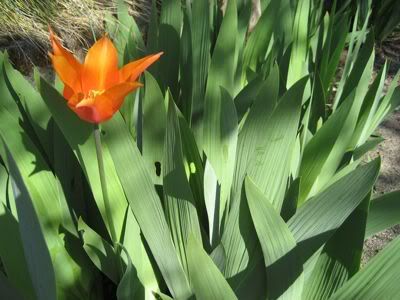
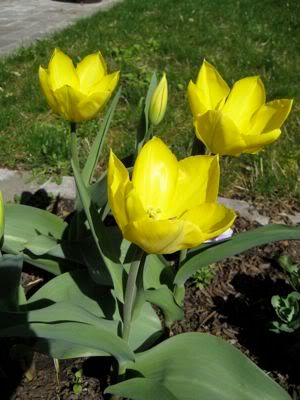
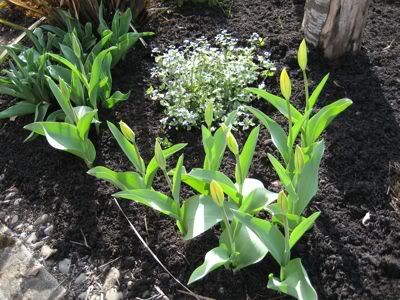
I also spotted the first robin of the season and a humming bird. The poor little humming bird was trying in vain to visit those plants that naturally have nectar for them... just *much* later in the season. Some of them haven't even sprung up yet. How frustrating! lol. The Dogwood on the hell strip is starting to bloom and the one in the front yard is finally starting to leaf out. The next round of tulips are just blushing into their color. They're very pretty next to the giant yellow one's. I'll try to take a picture tomorrow.

In classic springtime weather it was a little crazy today. It was sunny, it rained and we got hit HARD twice by a down-pouring of pea sized hail. I checked the plants and they weathered it fairly well. No holes.

Also my Zinnia's sprouted today along with one chive seed and another round of lettuce. I might have to pot up the lettuce - I'm starting to run out of room for them in the beds!

WEATHER: 41.6 °F with Light Rain
Windchill: 38 °F
Humidity: 78%
Dew Point: 35 °F
Wind: 7.0 mph from the SW
Wind Gust: 12.0 mph

Sunday, April 12, 2009

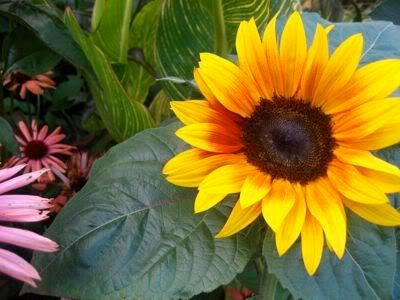
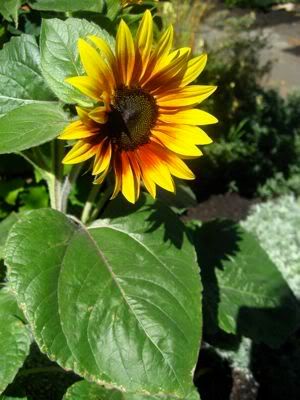
Sunflower - Ring Of Fire

Sunflower - Ring Of Fire
Photobucket
Helianthus annuus
These beautiful flowers greet the morning sun with gleaming bicolored petals that are dark red toward the center and tipped golden yellow outside. They are visually striking in the garden and in a vase in your home. The 5-6 inch diameter flowers grow on long side stems, perfect for tall arrangements. Grows a manageable 4 feet tall. Germination code: (4)

Seed Depth: 1/2"
Soil Temp for Germination: 65-75°
Days to Germination: 7-14
Light Requirements: Full Sun
Thin Plants to: 10"-18"

Helianthus annuus: Sunflowers are impressive both in the field and in the vase, and the seeds make for pleasant eating; at least the birds think so!

CULTURE: All sunflowers do best in areas with full sun. Sow seeds April through May. Optimum soil temperature: 65-75°F. Days to germination: 7-14. Sow 1/2 inch deep, 3-4 inches between plants, and 30 inches between rows. Thin to 12-18 inches, leaving the strongest plants. To promote deep roots and strong stems, water deeply but infrequently. One to two cups of our complete fertilizer per 10 row feet in the spring is adequate for the year. Over fertilization may cause stems to break in the fall.
DISEASE AND PESTS: Watch for cutworms and weevils in the spring. A Rotenone powder, dusted or sprayed, works well for control. Avoid wetting the foliage to help prevent rust. Bird netting will discourage birds.
HARVEST: Cut flowers in the morning just after they open. Use a clean knife, a clean vase, and a few drops of chlorine bleach in the water, along with Floralife Cut Flower Food, to help maintain freshness. Cutting the mature central flower head will promote side-shoot flower production. Black-hulled sunflower seeds, like Sunseed, are a favorite with seed-eating birds. Harvest the heads when the bracts begin to shrivel, and hang the flowers upside down in a barn or shed. For seed-eating gardeners, gray and white striped sunflower seeds, such as Giganteus, are the leading choice for munching raw, or roasted and salted. Harvest these the same way.
SALTING: When dry, rub the seeds off the heads and soak overnight in 1 gallon of water with 1 cup of salt added. Drain, and then dry in a 250°F oven for 4-5 hours and store in an airtight container."

----------
PURCHASED: .5g from Territorial Seed Co. via Portland Nursery for $2.70
STARTED SEED: Good Friday 04/10/09.
HARDENED OFF:
TRANSPLANTED IN GARDEN:
DISEASE ISSUES:
INSECT ISSUES:
HARVEST YEILD & DURATION:
OTHER NOTES:

2008 Garden Pictures:
Photobucket

Photobucket

Photobucket

Morning Glory - Flying Saucer

Morning Glory - Flying Saucer
A sister of 'Heavenly Blue', this vigorous morning glory is crystal white with radiating sky blue stripes. Flowers open in the cool of morning. Excellent color for quickly covering a trellis or fence. Can also be grown in pots, baskets, or as a ground cover.
Please note that all parts of this plant are poisonous, including the seeds.

Days to Germinate: 10-14
Depth to Sow: 1/2"
Seed Spacing: 2" - 3"
Plant Spacing: 6" - 12"
Growing Height: 15'
Type: Annual

CULTURE: As a general rule, flowers can be sown in the garden when the soil has warmed to at least 55°F. Flower seeds sown outdoors germinate best in well-worked, loose-textured soil. Flowers respond to fertilizer and good watering practices. Add 1-2 cups of our complete fertilizer per ten row feet to provide adequate nutrition. Seeds should be buried two times their narrowest dimension and covered with finely raked soil or vermiculite unless otherwise noted. Some varieties can take over a month to germinate so mark your rows, keep them moist, and for larger seeds like sunflowers, use bird netting to deter your feathered friends. To encourage earlier blooms, many varieties can be started indoors or in a greenhouse. Always start with a sterile seedling mix and clean pots. Sow 5-6 weeks prior to your last frost. Most seeds germinate better if kept warm, 70-80°F, and covered with a sheet of plastic or a Propagation Dome to retain moisture. If seeds need darkness, cover with two sheets of newspaper. Remove the plastic or newspaper upon the first signs of germination. The most common mistake is over watering. Keep the soil moist, not soggy, and provide adequate drainage. A slight airflow helps reduce fungus problems such as damping off. We recommend feeding your seedlings a balanced grow formula, diluted to 1/4 strength. This will provide the right amount of nutrition for your young plants. Up-pot if necessary and transplant out after the danger of frost has passed.
For more information, please refer to the germination codes given for each variety, as well as the additional culture blocks throughout this section. Then enjoy a gorgeous display of blooms all summer long!
(A) Annual: Will tolerate cool weather but not frost.
SOAKING: If you prefer to soak your seeds, follow these simple guidelines: soak in 85°F water for 1-3 hours and plant immediately. Longer soaking times are often detrimental; seeds need air to live.
PESTS AND DISEASES: Flowers are prone to some of the same diseases that we find in the vegetable garden. Proper sanitation, watering, and good weed control will generally alleviate most of the problems. Rotenone or Rotenone-Pyrethrin will control most insects.
HARVEST: For the best fresh-cut flowers, harvest in the morning when the flowers are their freshest and the petals are just opening. For optimum results, cut with a clean knife that has been dipped in a solution of 10% household bleach. A few drops of bleach in the vase along with our Floralife Cut Flower Food will prolong their beauty for days.
GERMINATION CODE: Given at the end of each description to give you specific information.
(4) Direct sow in the garden as soon as the soil warms to at least 55°F.

----------
PURCHASED: .65g from Botanical Interests (Seed Co.) via Garden Fever for $1.89
STARTED SEED: Good Friday 04/10/09. Sprouted on Easter Sunday 04/12/09. Two days!
HARDENED OFF:
TRANSPLANTED IN GARDEN:
DISEASE ISSUES:
INSECT ISSUES:
HARVEST YEILD & DURATION:
OTHER NOTES: 04/12/09: This is one of the few plants I'm concerned about putting in the garden with a toddler around since it's poisonous. I might transplant this into the front garden where she's less likely to "snack" on the local flora. I don't think she'd be likely to eat leaves or flowers though so I might just have to keep a close eye on her if I do put it near the kitchen garden. (I mostly want it put it there to attract beneficial insects.)

Morning Glory - Clarke's Heavenly Blue

Morning Glory - Clarke's Heavenly Blue
Ipomoea tricolor We give this one two thumbs up for its must-see-to-believe flower color. A photo cannot do justice to the beauty of Heavenly Blue. A showy climber with 4-5 inch sky blue flowers shading to creamy white throats. Plants climb to 15 feet and are one of the best annual vines we've seen. Flowers open in the morning and fade in the afternoon. Germination code: (4) Morning Glory is a large family incorporating about 50 genera and 1200 species. Most of them are twining herbs.

Days to Germinate: 10-14
Depth to Sow: 1/4"
Seed Spacing: 2" - 3"
Growing Height: 8' - 10'
Type: Annual

CULTURE: As a general rule, flowers can be sown in the garden when the soil has warmed to at least 55°F. Flower seeds sown outdoors germinate best in well-worked, loose-textured soil. Flowers respond to fertilizer and good watering practices. Add 1-2 cups of our complete fertilizer per ten row feet to provide adequate nutrition. Seeds should be buried two times their narrowest dimension and covered with finely raked soil or vermiculite unless otherwise noted. Some varieties can take over a month to germinate so mark your rows, keep them moist, and for larger seeds like sunflowers, use bird netting to deter your feathered friends. To encourage earlier blooms, many varieties can be started indoors or in a greenhouse. Always start with a sterile seedling mix and clean pots. Sow 5-6 weeks prior to your last frost. Most seeds germinate better if kept warm, 70-80°F, and covered with a sheet of plastic or a Propagation Dome to retain moisture. If seeds need darkness, cover with two sheets of newspaper. Remove the plastic or newspaper upon the first signs of germination. The most common mistake is over watering. Keep the soil moist, not soggy, and provide adequate drainage. A slight airflow helps reduce fungus problems such as damping off. We recommend feeding your seedlings a balanced grow formula, diluted to 1/4 strength. This will provide the right amount of nutrition for your young plants. Up-pot if necessary and transplant out after the danger of frost has passed.
For more information, please refer to the germination codes given for each variety, as well as the additional culture blocks throughout this section. Then enjoy a gorgeous display of blooms all summer long!
(A) Annual: Will tolerate cool weather but not frost.
SOAKING: If you prefer to soak your seeds, follow these simple guidelines: soak in 85°F water for 1-3 hours and plant immediately. Longer soaking times are often detrimental; seeds need air to live.
PESTS AND DISEASES: Flowers are prone to some of the same diseases that we find in the vegetable garden. Proper sanitation, watering, and good weed control will generally alleviate most of the problems. Rotenone or Rotenone-Pyrethrin will control most insects.
HARVEST: For the best fresh-cut flowers, harvest in the morning when the flowers are their freshest and the petals are just opening. For optimum results, cut with a clean knife that has been dipped in a solution of 10% household bleach. A few drops of bleach in the vase along with our Floralife Cut Flower Food will prolong their beauty for days.
GERMINATION CODE: Given at the end of each description to give you specific information.
(4) Direct sow in the garden as soon as the soil warms to at least 55°F.

----------
PURCHASED: .65g from American Seed via The Dollar Store for $1.00
STARTED SEED: Good Friday 04/10/09. Sprouted on Easter Sunday 04/12/09. Two days!
HARDENED OFF:
TRANSPLANTED IN GARDEN:
DISEASE ISSUES:
INSECT ISSUES:
HARVEST YEILD & DURATION:
OTHER NOTES:

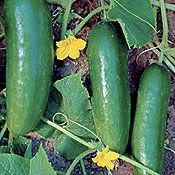
Mideast Prolific Cucumber

Mideast Prolific Cucumber

Photobucket
Cucumis sativus 5-7 in. Tender Annual
5-7 in. Excellent flavor whether pickled or fresh. Thin-skinned and never bitter. Our best flavored salad cuke. Vines bear extremely early and were the most productive in our field variety trials. Adaptable to a variety of climates. Organic. OP.

Planting Depth: 1/2"
Soil Temp. for Germ.: 70-90°F
Days to Germ.: 4-12
Plant Spacing: 2' - 3'
Days to Maturity: 50-60
Full Sun/Partial Shade Moderate Water

Cucumis sativus: Native to Africa and Asia, cucumbers were cultivated in India as long as 3000 years ago. One of the most domesticated crops, cucumber breeders strive to improve quality and disease resistance in this very popular garden vegetable.

CULTURE: For the best yields, it is important to provide ideal growing conditions for cucumbers. If the weather is not warm and dry, vines grow slow and plants tend to fall prey to disease. Wait to direct sow or transplant until soil temperatures are 60°F or warmer. Seeds will emerge in 4-9 days if soil temperature is 70-95°F. For best germination, keep the soil lightly moist but not too wet.
TO DIRECT SOW: We recommend raised beds. They improve drainage, warm up earlier, and increase the root zone depth. Sow in groups of 4-6 seeds in raised beds or hills. Plant seed 1/2 inch deep, and space the groups about 3 feet apart in all directions. Under each group of seeds, work 1/2-1 cup of our complete fertilizer into the soil. After the seed is up and growing, thin to 1-2 plants per group or hill.
FOR TRANSPLANTS: In short-season climates, starting seed indoors can be necessary. Cucumber transplants don't like their roots disturbed, so start them in individual peat pots at least 3 1/2 inches across. Fill pots with a sterile seedling mix and plant seed 1/2 inch deep. After they've emerged, place the seedlings in a sunny, warm spot. They should only be about 3 weeks old when transplanted in the garden. Harden off about a week in a cold frame if you have one. Set whole peat pots in the soil, making sure the entire pot rim is below the soil line. If any part is above ground, it will wick moisture away from the roots and weaken plants. Space and fertilize as described above for direct sowing.
MULCHES & PLANT COVERS: These materials have proven to help plants grow faster, flower sooner, and yield more fruit. We recommend green or silver mulch, plus a floating row cover of Grow Guard 20 or Reemay early in the season to achieve these results.
DISEASE: Where disease is a known problem, choose resistant varieties. Remove plant refuse and control insect pests. Consult your local county extension agent for disease specifics.
INSECTS/PESTS: Control striped and spotted cucumber beetles with Rotenone or Rotenone-Pyrethrin; apply regularly as long as beetles are evident. They primarily infect plants with bacterial wilt disease, which is devastating to plants. Keep border areas of the garden mowed.
HARVEST: Keep your cucumbers picked, and they'll keep producing. When stored at 40°F and 95% relative humidity, they may last up to 3 weeks. Chickens like big cucumbers.

----------
PURCHASED: 1.5g from Seeds of Change
STARTED SEED: Good Friday 04/10/09. Sprouted on Easter Sunday 04/12/09. Two days! Started these much later then I should've. Hope to fix that next year.
HARDENED OFF:
TRANSPLANTED IN GARDEN:
DISEASE ISSUES:
INSECT ISSUES:
HARVEST YEILD & DURATION:
OTHER NOTES:

Friday, April 10, 2009

Seeds, Sunflowers and Should Haves

Sorry no pictures today but just checking in to say I was pretty productive. I replanted the peas this afternoon and tacked up the twine for them to run up (eventually). I also started a few seeds: the last of the herbs (some of which should've been planted much earlier!*) a lot of flowers and one lonely little veggie. Also late. I'll probably work on adding in little info posts on each one later this evening. In case you didn't know I go back and add pictures of the progress of each of these and make notes if you're ever curious how a specific plant of mine is doing.

One other amusing thing. I bought a sunflower variety last year as a start called Ring of Fire. It's a beautiful little sunflower though only gets about 3' high at most. I saved the seeds because it was so expensive! ($5! for a 4" pot). This year when I was acquiring seeds I picked up a pack of Ring of Fire seeds, not remembering that that was the sunflower I already had! I guess I really like it having bought it twice! So this afternoon when I was starting my seeds I discovered this and it made me laugh. I'll have to see how my own saved seeds stack up against the commercial variety in the germination race. I planted both side by side. ::g::

*I realize that my seeds are in a bit of disarray - tucked into various jars with no rhyme or reason. My plan, given a free moment, is to go and sort them all by their start date. That way I won't miss any! I realized that I started quite a few late this year and so it doesn't happen to me next year I'm hoping that if they're all labeled something like, "Start 6 - 8 weeks before last frost" no one will get left out.

Wednesday, April 8, 2009

A quick update

I'm in a better mood today. No more of my lettuce was munched out in the garden beds. (Though I did notice a few radish leaves were nibbled but they're not as tasty apparently.) My broccoli is looking quite vigorous and is doing well. Lucky the Onion is sending up good green healthy shoots. The peas that did come up look happy and (for now) untouched by munching critters.
Photobucket

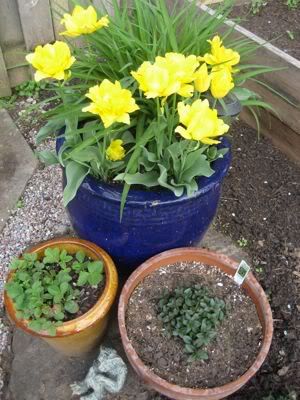
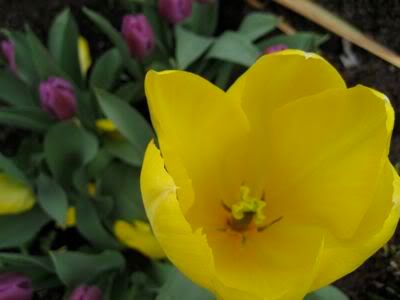
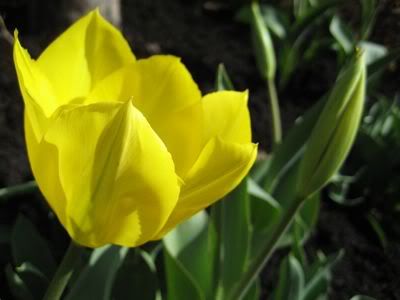
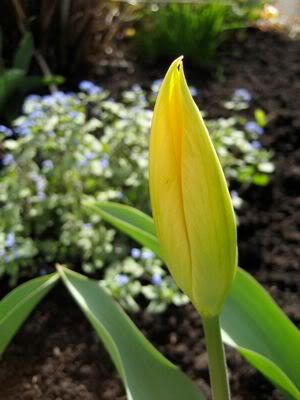
Also it's hard to be upset when you have sunny yellow tulips to look at.
Photobucket

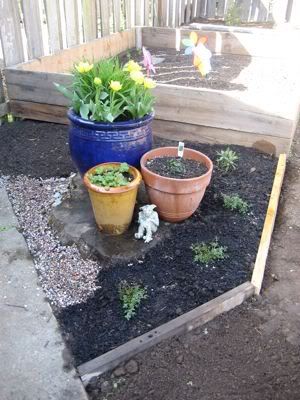
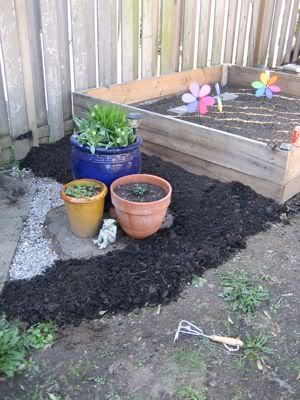
I did manage to get the new flower bed mulched. It'll be dahlia's behind the pots as a micro cut flower garden in the late summer. I also think I need some Blue Star Creeper to grow in front of the pots and stump. I still need to lay down some board to define where the hard edge of the bed will be. Where it's brown dirt in front will eventually be a crushed gravel path. I'll be glad when I finish all the hard-scaping so I can focus on the fun part - dirt and plants!
Photobucket

I have noticed too that birds and animals seem much more interested in our backyard then they ever have been before. Okay, let me rephrase that, squirrels, blue jays and crows are interested. I chased two squirrels out of the squash bed the other day (not that there's anything planted there yet) but still. They looked suspicious! I better not find walnuts or peanuts growing there later this summer. lol

Sometimes I just need to take a deep breath and remember that nature abhors a vacuum. It will all grow eventually.

Tuesday, April 7, 2009

Gardening FAIL

Bah. If it can go wrong it will.

PEAS:
Seems only about 1/4 of my peas have sprouted. I dug up the duds to see what was going on - looks like they turned to rotten mush. We've had quite a bit of rain since I planted them. The good news is now I'll have a staggered planting for a staggered harvest. I'll go and replace the one's that haven't come up later this week.

LETTUCE:
I've never had so much trouble with lettuce before. The seedlings in the garden are still being eaten alive. I've lost four more. I've picked slugs and snails out of the bed every night. Though I went out twice last night and didn't find any. I need to make the time to go get sandpaper and tack up strips. Hard to do lately with a sick toddler and an injured husband.

The latest seedling starts are turning yellow and wilting. I think maybe too much water and maybe too close to the lights - too warm. Though I've been letting the soil go pretty dry between waterings, so I don't know what the problem is. I've moved them further from the lights so we'll see if they perk up a little.

TOMATOES:
I was working downstairs and put on the space heater for a small bit. Sadly I accidentally left it on. The tomato starts didn't like the extra heat and wind and let me know it by curling up their leaves a little bit and turning yellow. Ug!

SAGE:
Remember my sage start that had the aphid probelms? Well I think it would've been better off if I hadn't helped. I sprayed some organic insecticide on it and 1/2 of the leaves turned black and fell off. ::shakes head:: The good news is I think the poor plant will recover. It's put out three new sets of leaves and the aphids are definitely gone! I think I just to try a test area if I use it again. I might have also not diluted it enough so I'll mix up a new batch if I try it again.

I just feel so disappointed. I wish I was a pro and never made a mistake and all the plants were happy and green and bug free. ::sigh:: Live and learn I guess.

Monday, April 6, 2009

Carrot Fly

Carrot Fly is the only pest you are likely to encounter with carrots. It is a black fly about 1cm (half inch) long which lays its eggs in loose soil around the base of the carrot foliage. The eggs mature into yellow maggots which then attack the carrots causing serious damage.

The main danger period is mid-May when the flies are most common. One simple solution is to postpone sowing maincrop varieties until June. In addition, pay special attention to firming back the soil after any thinning, and perform this task as late in the day as possible. The use of pelleted seed is another alternative - it will reduce the need for thinning.

Below is an extract from the GardenAction forum of a post by Mary. It sounds worthwhile trying!

"Hi all, just a little info. After reading all the advice I could find on carrots and onions, I had a plan of attack!! I planted alternate rows of carrot seeds and onion sets, leaving about 15 inches for weeding and walking between them. Once the carrots were about 2-3 inches high, I earthed both them and the onions up as I had read this can help prevent carrot and onion fly, as should the alternate rows planting thingy. I didn't touch them, not even to thin the carrots!! until they were ready for young carrots to be picked, and used this as my 'thinning' technique. I am pleased to report I have had not one single carrot or onion fly, and although the carrots are seriously overcrowded, they are delicious, and only a few are twisted together. I am now picking them every 2 days or so for the kitchen, thinning as I go, and they are now 4-5 inches long, straight, and up to 1 inch across. I will most definitely earth them up in future, and not touch during carrot fly month. I hope this info. will be useful to anyone with carrot fly problems. Also last year, I had ants farming things in the top of my carrots, not so this year with the earthing up. Good luck everyone , Mary"

Off to the beach!

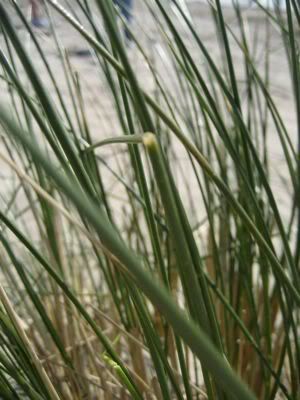
Didn't manage to get any gardening done yesterday (except to spay the garlic with sulphur to help with the purple blight) - we headed out to the beach instead. It was the first warmish weather we've had this year so we thought we'd take advantage. It was only about 60° down on the water a bit breezy but sunny and lovely otherwise.

Photobucket

Photobucket

Photobucket

I think today we'll stay home and hopefully my toddler will let me work some more on cleaning up the front flower beds. They're still mostly a mess. (Weeds, leaves from fall, etc. need to be pulled up and a fresh coat of compost, as mulch, laid down.)

Saturday, April 4, 2009

A day in the sun!

Today turned out to be amazingly wonderful. It was sunny, warm and the perfect temperature for gardening: 65°F. I even had to wear sunscreen! It felt so good to just breathe in the sunshine and warmth and smell the flowers and get my hands dirty. I really focused mostly on cleaning up the beds in the front yard today but did manage to plant the last round of spinach in the kitchen garden this morning. It's a good thing considering it's starting to get late to plant spinach, not too late mind you but definitely toward the end of the proper time frame.

The nice thing about working in the front yard is I get a chance to visit with the neighbors. We don't see each other all winter with the dreary weather. I think *everyone* was outside today! I didn't get done nearly as much as I was hoping to but I had a nice visit with at least eight neighbors!
Photobucket
Photobucket
Photobucket

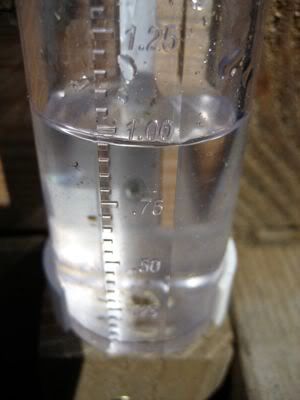
1" of rain since last Saturday.
Photobucket

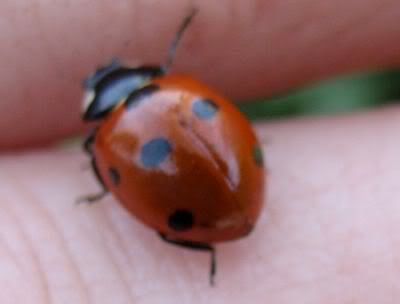
... and I ran into a few friends today. The other lady bug was too fast to get a good picture of. I also came across more pests then I like to see too. Cut worms are mine enemy! And the snails love the New Zealand Flax... probably because predators (myself included) can't get at them way down at the base where they're hiding on the big wide leaves. I can see them though and it just makes me crazy. I should put out some beer bait while there's no rain. It might be a loosing battle. I wonder how much salt the flax could handle....
Photobucket

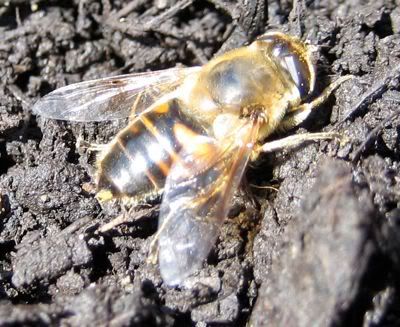
Lastly, can anyone tell me if this is a fly or a bee? It looks like a bee but it was really acting very fly like. Weird.
Photobucket

Oh and how could I forget to mention this? I got a free yard of compost today! I took the pickup to get a load and the girl that I usually give my $$ to was so busy with taking phone orders, etc. that she couldn't even be bothered to take a payment from all of us standing in line. One of the drivers came out and told the two guys in front of me, who were dropping off yard debris, to just drop off their stuff and if they had a $20 bill to come back and just leave it at the window. He then turns to me and says to just go ahead and get a load and come back another time to pay them! How nice! So yeah. It's not really free cause I'm honest like that but it's fun to think it's free for awhile. ;^)
Weather: 54.6 °F and Clear
Humidity: 38%
Dew Point: 29 °F
Wind: 2.0 mph from the SSE
Wind Gust: 12.0 mph

Jack Frost

Well I got out there last night and covered everything up.
Photobucket
It took me 45 minutes because I didn't really have any appropriate coverage materials so I was digging around in the garage for packing blankets and paint tarps, etc.

The good news? I found two slugs and kicked them out. They've really been decimating my green lettuce 'Salad Bowl'. I think I really need to tack up strips of sandpaper on the insides of the raised beds to help keep them out.

The bad news? No frost. Yeah, all that scrambling around in the dark for nothing. Sigh.