71 days. Reliably bountiful, this robust bell has a delicious, sweet flavor and crisp, crunchy texture. The 3-4 lobed fruit have moderately thick, juicy walls and turn from a glossy green to a bright red at maturity. They flourished and ripened during an unusually chilly summer at our trial farm. We love the beefy, elongated bells for everything from salads to stuffing or frying. Also available as a plant. HV
"Capsicum annuum: From the hottest habaneros to the mildest sweet bells, we have selected an outstanding array of peppers for the kitchen gardener and the pepper fancier. Although peppers are tropical, heat-loving plants, almost anyone can successfully grow a good crop.
CULTURE: Using a sterile seedling mix sow seeds 1/2 inch deep 8-10 weeks before your last frost. Optimum soil temperature for germination is 70-85°F. Days to emergence are 8-25 days. Germination rates may be erratic if soil is allowed to dry out. Once the seedlings have 2 sets of true leaves, they can be up-potted to a 3-inch pot, and grown at 70°F during the day and 60°F during the night. Make sure the seedlings have plenty of light, and give them an organic liquid fertilizer solution, such as 2-1-1 Earth Juice Grow fertilizer. Remember strong transplants perform best and will give highest yields. Peppers grow very slowly, or not at all, in cold soils, so resist the temptation to plant outside too early. The timing for transplanting is perfect when the plants are just starting to become root bound, the garden soil has warmed to at least 60°F, and the nighttime temperatures remain above 50°F. Transplant peppers outside 2-3 weeks after tomatoes, typically the first half of June. The bed should be rich and well supplied with nitrogen, such as blood meal, fish bone meal, or composted chicken manure. This helps the plants make vigorous vegetative growth for their first 6 weeks in the garden. At planting time, use about 1/2 cup of nitrogen fertilizer side dressed below and around each plant. Set the plants 12-18 inches apart in rows 24-30 inches apart. When the plants start to flower, side dress 1/2 cup of complete fertilizer around each plant. As an option, consider using Black or Silver Mulch in the pepper bed. Also covering the plant with a floating row cover such as Reemay or Gro-therm can be especially helpful in early plantings. Be mindful of high daytime temperatures as the season progresses, as even heat loving vegetables such as peppers can get too hot. Remember to keep peppers uniformly moist throughout the growing season and you'll be enjoying the explosion of color, flavor, and heat that peppers offer.
INSECTS/DISEASES: Most insects and diseases that attack tomatoes will also affect peppers. Liquid Rotenone-Pyrethrin or a floating row cover will effectively eliminate insect pests if used early in the season. Whenever possible use disease-resistant varieties and proper sanitation in the garden. If you have experienced disease problems with either tomatoes or peppers, don't plant in the same spot for 2 seasons and rotate with a green manure crop.
HARVEST: Fruit set after late August usually will not fully develop or ripen. Peppers are generally fully ripe and have the most flavor and vitamins when they turn red, yellow, purple, or orange. They can be kept in good condition for at least 40 days at 32°F and 95% relative humidity.
SEED SPECS: Minimum germination standard: 70%. Usual seed life: 2 years. Days to maturity are calculated from date of transplanting and reflect edible green fruit. Approximately 35 seeds per 1/4 gram, about 140 seeds per gram; 14 grams per 1/2 ounce.
----------
WHEN TO PLANT: Although the traditional time table for starting pepper plants is 6 to 8 weeks before outdoor planting, I've had excellent results with much earlier seeding in late January or early February, which for me is a good 12 to 14 weeks before the frost free date.
HOW TO PLANT: If you can keep the soil temperature of your planting flat around 80°F to 85°F the peppers will germinate more rapidly then at 70°F, at which they usually take two or even three weeks. At cooler temperatures, 55°F to 60°F the seeds may rot before they germinate. Once when I let a flat of planted pepper seeds dry out, the seedlings emerged just as I was ready to give up on them. Later I learned that peppers, unlike most other vegetables, can germinate with low soil moisture.
Transplant the young seedlings at least once to a roomier flat and harden them off a week or two before your last frost date. If they're in blossom when you set them out, you might find it worthwhile to cover the plants at night until night temperatures are warmer. Cool nights in May and June can cause blossom drop, as can hot weather - especially over 90°F - in summer. The ideal temperature for these natives of the moist South American tropics is 70°F to 80°F.
Local garden sages advise setting out pepper transplants after the dogwood blossoms fall. Mine usually go into the ground about a week after our mid-May frost free date. If you want to get really technical, the soil 4" deep should measure 65°F at 8 o'clock in the morning.
When setting out pepper plants, I bury them 2"-4" deeper then they were in the flat, but not on their sides in a trench like tomatoes. Recent studies have shown that pepper plants spaced 12"-15" apart produce as much per foot of row as those more widely spaced and suffer much less sun scald.
GROWING CONDITIONS: Peppers do well without much added nitrogen, but they need a good supply of magnesium. They are also more tolerant of acid soil than many garden vegetables. Hot peppers are less likely then sweet peppers to obhect to the low levels of aeration in heavy clay soils. Water them well in hot and dry weather.
PESTS AND DISEASES: Protect them from cutworms and avoid soil where related plants - tomatoes, eggplant or potatoes - have recently grown if you've had disease problems.
Don't let tobacco users handle your pepper seedlings without washing their hands first. The virus that causes tobacco mosaic, which effects peppers, survives cigarette manufacturing processes.
REMARKS: According to a Dutch horticulturalist who tried removing all but four to six of the first blossoms from the pepper plants, this practice results in a higher mid or late season yields and also produces larger peppers.
----------
PURCHASED: 25 seeds/Sampler from Territorial Seed Co. (via Portland Nursery) Feb '09. $3.55
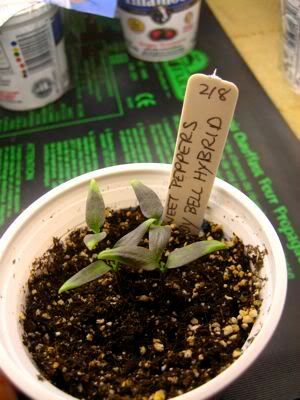
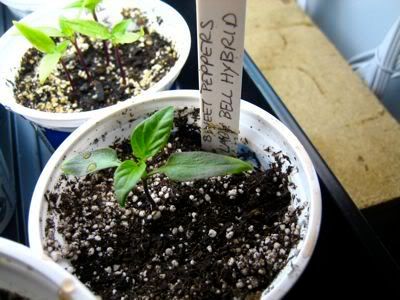
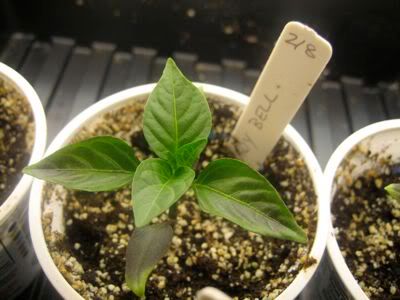
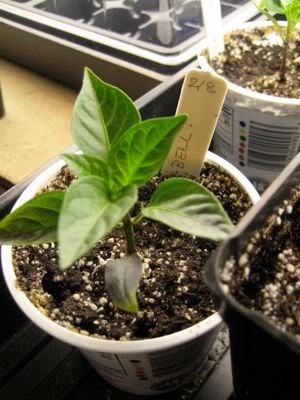
STARTED SEED: 2/8/2009 - in yogurt cups on the heating mat. Soil temp is 76°F at time of planting. First sprouts came up on 2/14/2009. What a nice Valentine's Day present! Germinated in a record 6 days! Leaves turned purple on 2/21/09. Phosphorous deficiency? I'll have to look into that. I sprinkled a little bit of fertlilzer on them this morning 02/24/09. Someone suggested that they are stressed because they're too warm. I've taken them off of the little heating mat they've been sitting on and moved them under the lights with the rest of the flats. Hopefully we'll see them go back to being green! They sprouted their second set of leaves which were a hale and hearty green. I seperated them out in to their own pots on 03/02/09 and give them a bit of seaweed feed.
HARDENED OFF:
TRANSPLANTED IN GARDEN:
DISEASE ISSUES: 04/12/09: As if I didn't have enough issues the peppers, today I noticed that I have what I think is Bacterial Leaf Spot. I clipped off the effected areas and bleached the scissors afterwards. I hope that's enough for now. I also need to get some 5-10-10 to help the plant recover, or so I'm advised. It's spread by moisture and water. Hard to escape that in the PNW. A copper based organic fungicide may help. I'm not there yet.
INSECT ISSUES:
HARVEST YEILD & DURATION:
OTHER NOTES:
02/23/09

03/02/09

03/16/09

03/23/09

No comments:
Post a Comment